Tag Archive for: diy

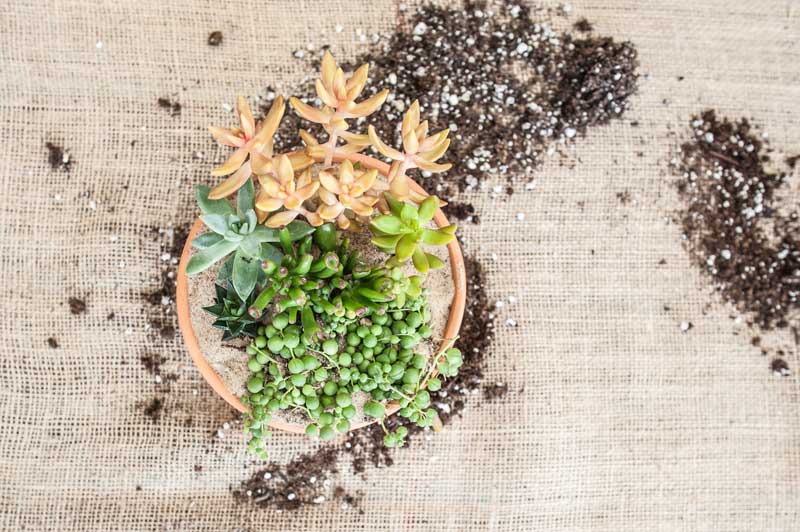
Create Your Own Fresh-Cut Floral Arrangement

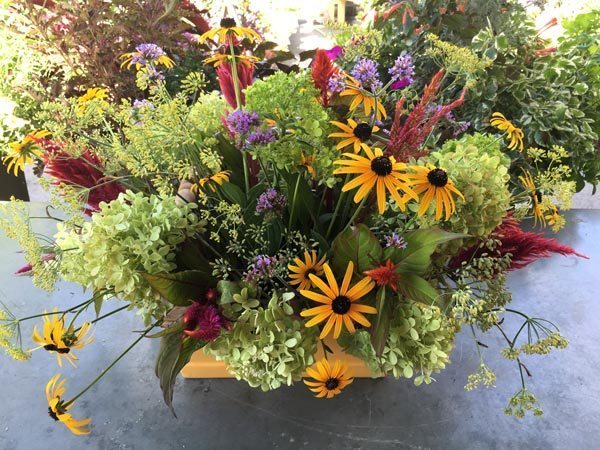
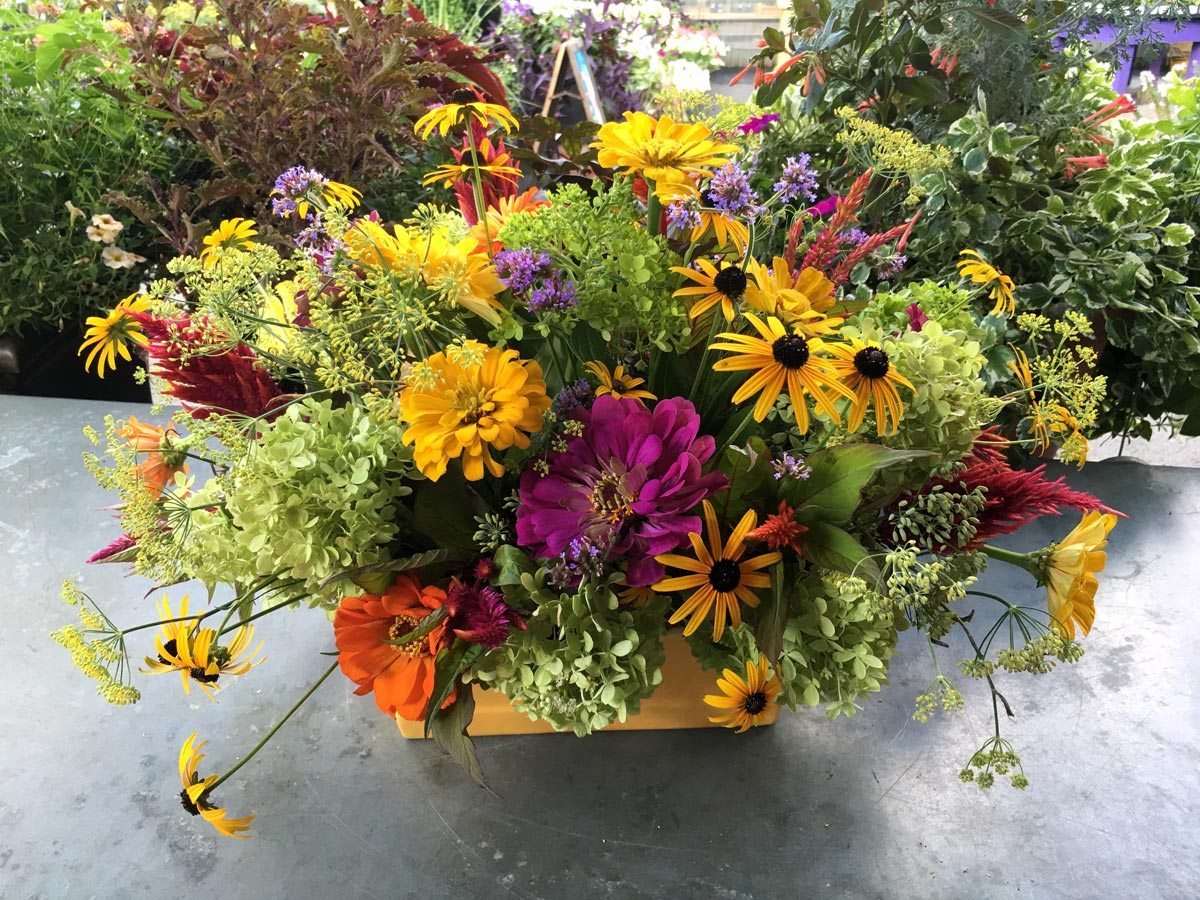
Fresh flower arrangements are a wonderful way to bring the outdoors in and transform your space seasonally with fresh blooms and greens. This step-by-step guide covers spring blooms, but you can use the guidelines to select and arrange flowers from any season in a beautiful arrangement for your home.
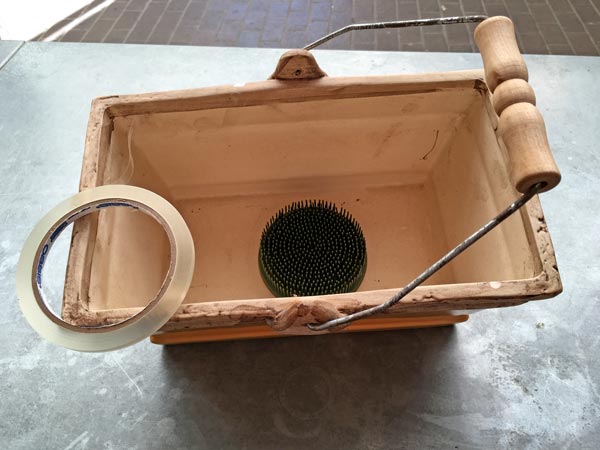
What You Need

Blooms, Branches and Greenery

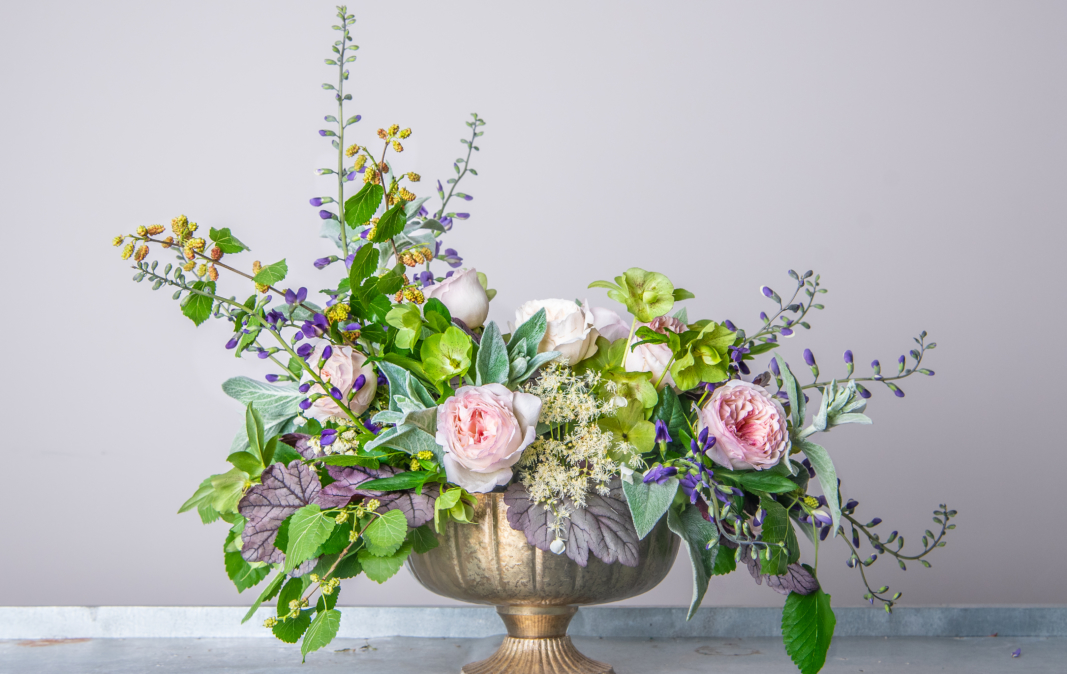
  • Linear blooms and branches (we used mulberry-4, and baptisia-7)
  • Fill greenery (we used hellebores-1, heuchera-6, climbing hydrangea-3, and lambs ear-5)
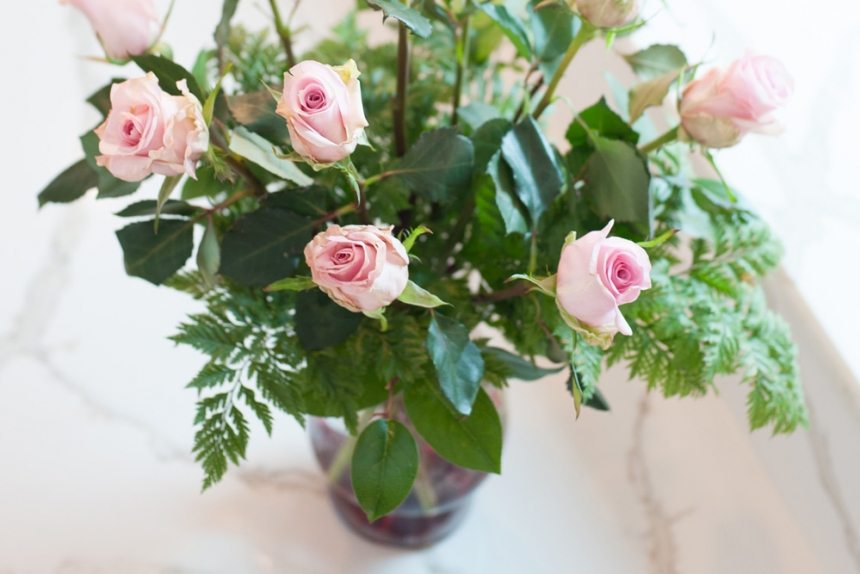
  • Focal flowers (we used garden roses-2)

Supplies

  • Decorative vessel of your choice (for a table centerpiece, the vessel should be about 1/6 the diameter or length of the table)
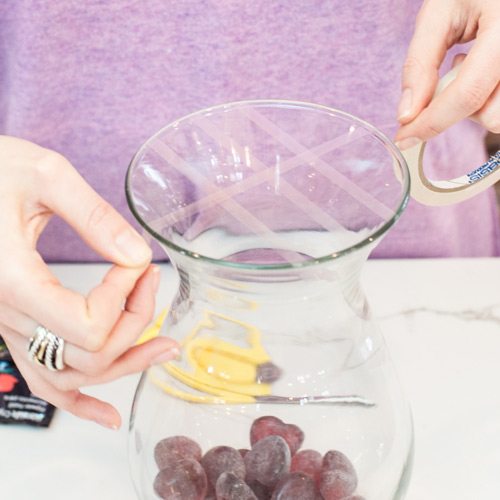
  • Floral foil or heavy-duty aluminum foil
  • Oasis or floral design tape
  • Two to three buckets/containers filled with warm water (you can use anything large enough to hold all your cut plants)
  • Floral food
  • Pruners
  • Floralife Clear Crowning Glory® spray

Step One: Select Your Vessel and Flowers

When arranging flowers for a dining table centerpiece, the maximum length of the full arrangement should be about a third of the table’s length. An appropriately sized vessel will be one-third of this measurement, or a sixth of the overall table length. Of course, this is not a requirement! Select a vessel and arrangement size that suits your taste and decor, and line it with floral foil or a heavy duty aluminum foil to protect your vessel.  

Select plants from your garden to enjoy indoors, or visit your local florist for flowers. Choose plants in good condition with healthy foliage. Flowers should have just opened or be in bud form. 

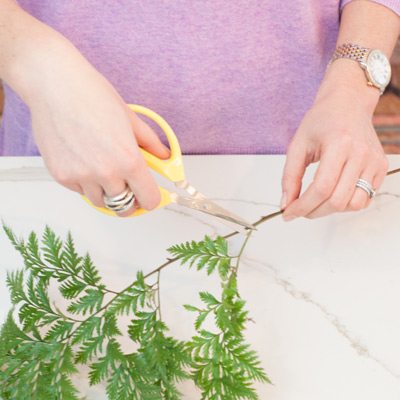
If you are cutting stems from your own garden, bring your bucket of warm water with you if possible, and cut your flowers from the garden in the morning when the weather is cooler. The heat later in the day can shock cut stems and cause them to wilt. After cutting your stems, put them in your warm water with floral food right away. The floral food controls bacteria levels and assists the stems with the absorption of water.

If you can’t bring a bucket of warm water outside to the garden with you, re-cut your stems an inch above your cut line before placing them in warm water inside. Leave the clipped flowers in the warm water with the floral food for about 30 minutes to give the stems time to condition.

Step Two: Prepare the Oasis

Cut your oasis block to a size that fits your vessel shape without compressing the oasis. A compressed oasis will not hold water, so this is an important step to ensure your arrangement lasts.

After sizing your oasis, soak it in water and floral food for 30 minutes using a bucket or sink, then place it in the vessel. 

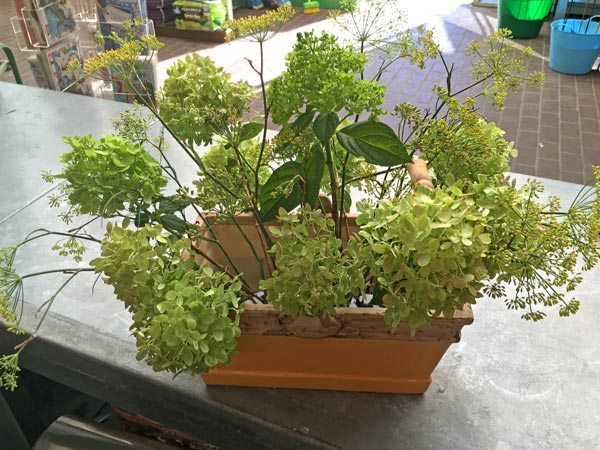
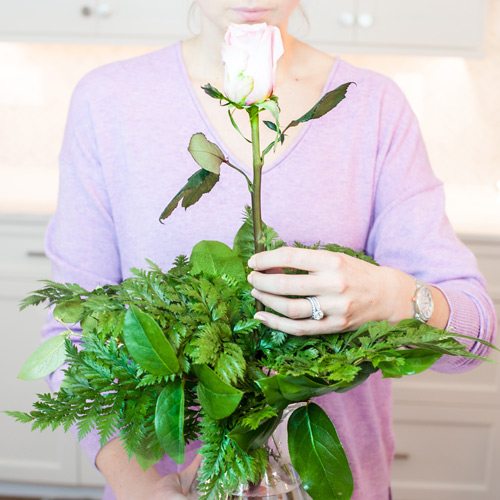
Step Three: Arrange Structural Blooms

Place your branches or structural blooms, in our case mulberry and baptisia, to create the lines and overall movement for your arrangement. It’s best to begin with the highest point first. Keep in mind the viewpoint from which your arrangement will be enjoyed when deciding where your flowers should go. Some arrangements will be viewed from all sides, while others may be against a wall and only visible from 3 sides. 

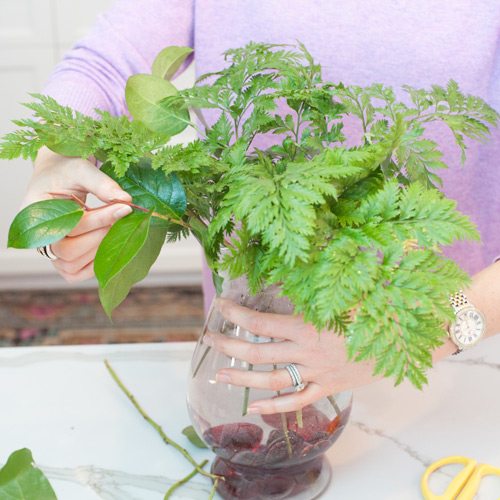
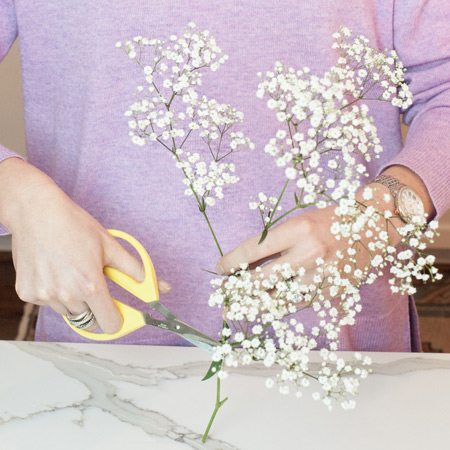
Step Four: Place Greens and Fill Flowers

Using your filler greens (the hellebores in this arrangement), start around the perimeter or your arrangement and move inwards as you place them to fill in the overall shape. Keep it light, and avoid overcrowding so that room remains for the focal flowers. You can always go back and add more as desired after placing the focal flowers. 

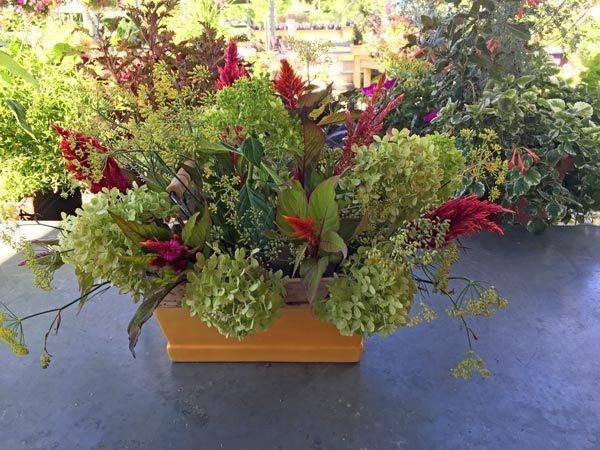
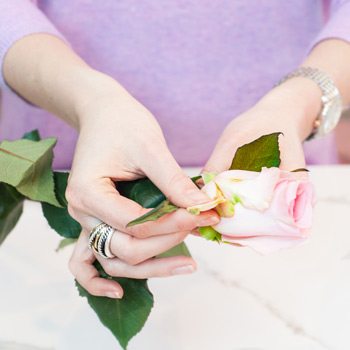
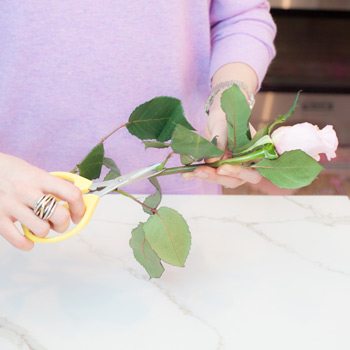
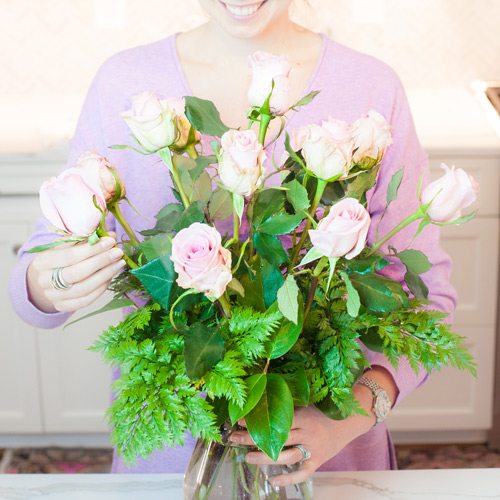
Step Five: Place Your Focal Flowers

When placing your focal flowers (garden roses in this arrangement), think in triangles. Triangular shapes provide dimension and keep your eye moving throughout the arrangement. You want to avoid having your focal flowers make a line. 

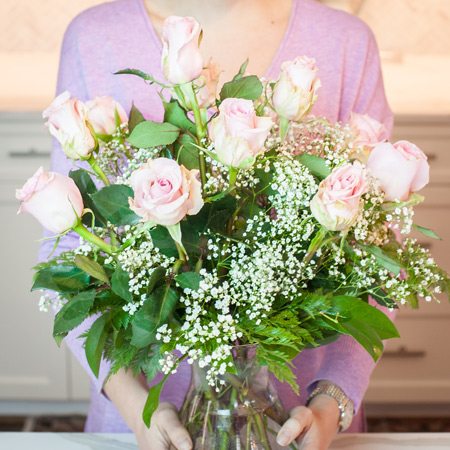
Step Six: Hide the mechanics

Using complementary fill flowers or greenery (heuchera, lambs ear, and climbing hydrangea in this arrangement), hide the oasis, floral tape, and other ‘mechanics’ of the floral arrangement and highlight your focal flowers.

Step Seven: Preserve Your Arrangement

When your arrangement is complete, spray it with Crowning Glory preservative. This helps the plants hold in moisture, keeping flowers more vibrant.

To keep your arrangement fresh for as long as possible, flush the arrangement with water every other day and keep out of direct sunlight.

To flush the arrangement, place the vessel in the sink with water entering just inside the edge of the vessel, and leave the water running for a few minutes. The force of the running water will push out the old water and any floating debris out of your container. We recommend flushing the water at night so you can leave it to drip dry overnight.

If you make your own Fresh Cut Arrangement using these instructions, we would love to see it! Please share on Instagram and tag @merrifieldgardencenter for a chance to be featured on our page

Creating a Custom Container Garden

Container gardening can add ambiance to your backyard patio, tie into the architecture of your home and welcome your guests at your entrance. It’s also ideal for small spaces. You can have all of the convenience of a yard right outside your front or back door.

I love incorporating container gardens throughout my garden to create focal points in my sitting areas. Here are the simple steps I follow to construct my containers that you can easily follow to create your own custom container garden.

Step one: Select your plants

The goal with any container planting is to have the perfect combination of plants to thrill, spill and fill:

  • Thrill plants draw your eye into the container, creating a focal point through height, color, bloom or texture.
  • Spill plants draw your eye down and through the container by trailing over the edge.
  • Fill plants are those that help to fill the voids in the pot. They typically provide contrast to your thrill plant and add interest.

You can collect these plants from all different areas of the nursery. We love combining traditional blooming and foliaged annuals with perennials and petite shrubs for a unique combination. Plus, when you incorporate perennials and shrubs, you have the added benefit of having your container garden morph with you into future seasons where you can simply replace the faded annuals with cool season annuals when the weather changes.

We selected:

  • Variegated dracaena for our thrill
  • Setcreasea ‘Purple Heart’, jurassic purple begonia, and begonia hiemals as our fill
  • Airy asparagus fern as our spill

For our 14” container we selected a total of seven plants to fill the space, but not overcrowd.

Container Blog Photos
  1. Variegated dracaena 2. Begonia hiemals 3. Jurassic purple begonia 4. Setcreasea ‘Purple Heart’ 5. Asparagus fern

Step two: Select your materials

Once you have your plants selected, choose a container that compliments the blooms and foliage. You want to choose a vessel that will allow your plants to pop! When selecting a container, make sure it has a hole in the bottom for drainage. Here are a few other supplies you’ll need to get started:

  • Small square of landscape fabric: You’ll place this over the drainage hole in the bottom of the pot to prevent the soil from escaping the bottom (and the critters from coming up into the pot).
  • Potting soil: Potting soil is nice and lightweight, making it easy to work with in a container setting. We recommend using our Merrifield Potting Mix. For our 14” pot we’ll need two, 16 qt. bags.
  • Fertilizer: To keep your blooms ongoing throughout the season, we recommend using fertilizer at the time of planting. You can use an organic option such as Espoma Plant Tone, or an inorganic, slow release granular, such as our Merrifield Flowering Plant Food or Osmocote.
  • River jack stones or seminole chips to cover the top of the container surface: Squirrels love to burry in fresh soil, using small river jack stones or seminole chip will keep them out of your fresh plants. And, using either as a topper helps prevent the dirt from washing over the edge of the container when watering.
  • Hand shovel for scooping up the potting mix
  • Gardening gloves

Step three: Assemble your container

  • Since your container can be heavy once its filled with the soil and plants, it’s best to set the container into place before you plant.
  • Place your piece of landscape fabric over the drainage hole in the bottom of the pot.
  • Fill your container 2/3 of the way with potting soil.
  • Add your granular fertilizer to the potting soil and mix with your hand shovel. Be sure to follow the instructions on the label to determine the appropriate amount of fertilizer to mix in.
  • Place your plants into your container and adjust to alternate the color and texture until you balance out the interest throughout the pot. For a container that needs interest from all angles, place the thrill in the middle. If you’re designing a container for a corner area, you can place the thrill in the back of the pot and work down toward your spill plants in the foreground.
  • Top off the container with soil, but keep it an inch from the top of the container.
  • Cover the surface of the soil with a half-of-an-inch of small river jacks or seminole chips.

Step four: Care for your container garden

Container Blog Photos

Once your container garden is set, water it thoroughly using a watering wand and garden hose. Run the water over your container, letting it drain out of the bottom. How frequently your container garden will need water depends on the size of the container, plant mix and placement (full sun containers will dry out more quickly than shade containers). Check your container for water every few days to ensure that it does not dry out. As the weather warms you may need to check it more frequently.

To keep your blooms looking their best all season, we recommend using a water-soluble fertilizer, such as Jack’s Classic Blossom Booster. I like to use a half strength dosage every other week when watering.

Succulent Varieties, greenhouse

Creating an Indoor Succulent Container

Julia Reed, Merrifield Plant Specialist

I love houseplants. So much so that my entire dining room doubles as a greenhouse. One of my favorite houseplants is the succulent. They’re easy to care for, beautiful to look at, and bring instant life to your home or office. You can easily add a succulent display to your space by following these easy steps.

Select your supplies

To begin, determine the colors and textures you’d like to see in your space. I recommend choosing an assortment of varieties to pull your eye through to the different areas of the container. You can’t go wrong in picking those your eye is naturally drawn to. Here are some of my favorites.

Next, select your container and potting medium. You’ll want to choose a shallow, open air pot as succulents don’t have a deep root system and like to be open to the air. A closed terrarium structure will not make for happy succulents! The pot should also have a hole at the bottom to assist with drainage.

Succulents do best in fast draining soil. When potting succulents, I like to use a small layer of gravel with Cactus Mix or Pro-mix soil. If you’re using Pro-Mix, you’ll also want to pull aside some sand to help with drainage. Finally, you can also increase the drainage by using decorative sand or gravel on the surface.

Assemble your container

Step 1: Place a piece of typar or grower’s cloth on the bottom of your pot, over the drainage hole.

Step 2: Lay down a layer of gravel, between a half inch and an inch. This will help with your container’s drainage.

Step 3: Fill your pot with Cactus Mix or Pro-mix. We started by filling our pot half-way with soil (you can always add more, if needed). If you are using Pro-mix, I recommend mixing one part sand to two parts Pro-mix to help with drainage.

Step 4: Arrange the plants the way you want depending on your style. You don’t need to break up the roots. If the roots are covering the edges of their pot then you can lightly tease them.

Step 5: Fill in and around the plants with more soil to cover the roots.

Step 6: If you want, add gravel or sand as a decorative finish.

Finish off your container with fresh water. Move your container over to your sink and water directly into the soil until the water runs out the bottom.

Caring for your succulents

Succulents will take as much light as they can get. They prefer at least four hours of bright, direct light. You can find direct light in sunny areas of your home within one to two feet of an unobstructed south or west facing window. In these spaces, the sun should directly touch the plant. If they are not in good light, they will start reaching for the light, which will make them stringy. A compact succulent is a pretty succulent. Generally, you won’t have to worry about your succulents getting sunburned when they’re indoors.

Succulents store water in their leaves. You can always tell when it’s time to water by feeling the lower leaves of your succulents. If they feel flat and deflated, then they are thirsty. When it comes to watering, it’s safer to let them run dry than moist. We recommend checking them for water every few days. Keep note of the day you planted them and the day they feel dry to establish a general number of days between waterings. At my house, I’ve found that my succulents tend to need water about every two weeks. When watering in a regular container, water directly into the soil until you see water coming out the bottom.

To keep your succulents well-fed and long lasting, you can fertilize from March to September. We recommend Schultz Cactus Plus Liquid Plant Food. Keep in mind that feeding them will cause them to grow faster!

Even though it might be tempting, try not to baby your succulents. As long as they’re in a sunny spot with regular waterings, they’ll be happy!

Creating a Garden-Fresh Arrangement

Peg Bier, Merrifield Plant Specialist

The windowsill in my kitchen was always adorned with a love bouquet—a gathering of flowers picked from my garden and delivered slightly crushed by the small, loving hands of my children and grandchildren. Today one of my greatest joys is a walk through the garden with scissors in hand discovering unexpected treasures that combine into a beautiful arrangement.

Like anything, there are techniques you can use to create these arrangements. But what I’ve learned over the years is that the most important thing is to just do it! If it brings you joy and happiness, that’s all that matters.

Here are a few steps you can follow to design a fresh arrangement with materials from your garden.

Step One: Source Your Container

Select a vessel to use as your container. Don’t worry if you don’t have a collection of pots laying around, a water pitcher or small bucket can work great! Prep your container by cleaning it thoroughly and placing a pin holder in the bottom or taping off a support grid with waterproof tape. Once your support is secure, add fresh, cool water and floral preservative.

Garden-fresh-arrangements-1

Step Two: Select Your Plant Material and Assemble Your Foundation

When you head out to your garden, select a combination of cuttings from plants such as annuals, perennials, shrubs, trees, herbs and vegetables to bring in different textures and colors. Aim to pull a mix of three to six materials to vary texture, color and height.

Cut your base plants at varying lengths to build a foundation to support your arrangement. Here we used hydrangea blooms (a shrub) and fennel (a perennial) and varied the placement to alternate textures.

Garden-fresh-arrangements-2

Step Three: Layer in Flowers

Layer your flowers one variety at a time, beginning with the deepest and greatest volume to disperse color throughout the arrangement. Here we layered annual celosia and then brought in pops of color with verbena and rudbeckia.

Garden-fresh-arrangements-3

Garden-fresh-arrangements-4

Step Four: Add Your Focal Point

Finish your arrangement by placing your focal point flowers asymmetrically. In this arrangement, colorful annual zinnias become your focal point and provide the finishing touches.

Garden-fresh-arrangements-5

It really is as simple as that! You can create your own unique display by heading outdoors to your garden today. I hope you enjoy the process as much as the final result!

Long Stem Rose Arrangement Valentine's Day

How to Arrange Your Valentine’s Roses in a Vase

Rose bouquets and arrangements are a beautiful and timeless Valentine’s Day gift. Arranging your own vase of roses and other flowers will make the display even more special and thoughtful. Luckily, you do not have to work in a flower shop to put together the perfect rose arrangement. Follow our step-by-step guide for a beautiful display in no time!

Step One: Prep Your Vase

Use floral tape to create a grid across the opening of your vase. Use three pieces of tape per direction.

Create a grid with floral tape

Step Two: Add Floral Preservatives

Floral preservatives inhibit the growth of bacteria, which allows the cells to absorb water. You can add these either before or after you tape your vase—whichever you prefer.Then, fill your vase three-fourths of the way with lukewarm water, letting the water agitate the preservative.

Step Three: Trim Your Greens

Trim any broken leaves and branches that are too low on the stems of your greens. Cut the ends of your green stems at least ¼” on a steep angle. Cutting at a steep angle creates more surface area through which the cells can draw in water. Place your greens in the vase within eight seconds of trimming (if you wait too long the cells fill with air and prevent the stem from drinking). Place two to three greens in the center of your vase.

Tips for arranging your roses: Trim any broken leaves and branches that are too low on the stems of your greens. Trim the ends of your green stems at least ¼” on a steep angle. Cutting at a steep angle creates more surface area through which the cells can draw in water. Place your greens in the vase within eight seconds of trimming (if you wait too long the cells fill with air and prevent the stem from drinking).

Step Four: Place the Rest of Your Greens

Trim and distribute the rest of your greens evenly around the vase, creating a collar to visually soften the lip of your container.

Tips on arranging your roses: Trim and distribute the rest of your greens evenly around the vase, creating a collar to visually soften the lip of your container.

Step Five: Prep Your Roses

Remove the roses from the floral tubes. Take off any unattractive or damaged rose petals and leaves. Take your longest stemmed rose and cut the stem at least ¼” on a steep angle using a sharp knife or floral scissors. It’s important that your cutting utensil is sharp—if your knife or scissors are dull they will crush the stem cells, inhibiting the flowers ability to draw water.

Tips for arranging your roses: Take off any unattractive or damaged rose petals and leaves. , Tips for arranging your roses: Take off any unattractive or damaged rose petals and leaves.

Step Six: Establish Height

Place the tallest and straightest rose in the center. This rose sets the height for the rest of the arrangement.

Tips on arranging your roses: Place the tallest and straightest rose in the center. This rose sets the height for the rest of the arrangement.

Step Seven: Add More Roses

Select the next five tallest stemmed roses. Trim them to be slightly shorter (about one or two inches) than your center rose, trimming as you did your center rose. Trim all five one at a time, to the same length, placing them in water within the eight second window. Place these roses in the vase by aiming their stem ends toward and around the center rose. These roses should be spaced equally apart.

Tips on arranging your roses: Select the next five tallest stemmed roses. Trim them to be slightly shorter (about an inch to two inches) than your center rose, trimming as you did your center rose. Trim all five roses one at a time, to the same length, placing them in water within the eight second window. Place these roses in the vase by aiming their stem ends toward and around the center rose. These roses should be spaced equally apart.

Step Eight: Place the Rest of Your Roses

Measure and cut the remaining six roses to be shorter than the center and middle roses. Again, trimming one at a time. Place your roses between the existing roses, toward the outside edge of your vase.

Tips on arranging your roses: Measure and cut the remaining six roses to be shorter than the center and middle roses. Again, trimming one at a time. Place your roses between the existing roses, toward the outside edge of your vase.

Step Nine: Incorporate Fill Flowers

Trim your fill flowers (such as baby’s breath, tree fern, wax flower, or limonium) and tuck them into your arrangement where you see gaps. Your fill flowers should be lower and deeper in the arrangement than your roses.

Tips on arranging your roses: Trim your fill flowers (such as baby’s breath, tree fern, wax flower, or limonium) and tuck them into your arrangement where you see gaps. Your fill flowers should be lower and deeper in the arrangement than your roses.Tips on arranging your roses into a bouquet | Merrifield Garden Center

For best results:

  • Place your arrangement in a cool spot, away from direct sunlight and heating vents.
  • Replace the water in your vase with room temperature water daily.
  • Re-cut the stems every-other-day to allow maximum water uptake and keep your roses from drooping.