Tag Archive for: home decor

Air Plant, Tillandsia lindenii, Istock, greenhouse

Air Plant Guide

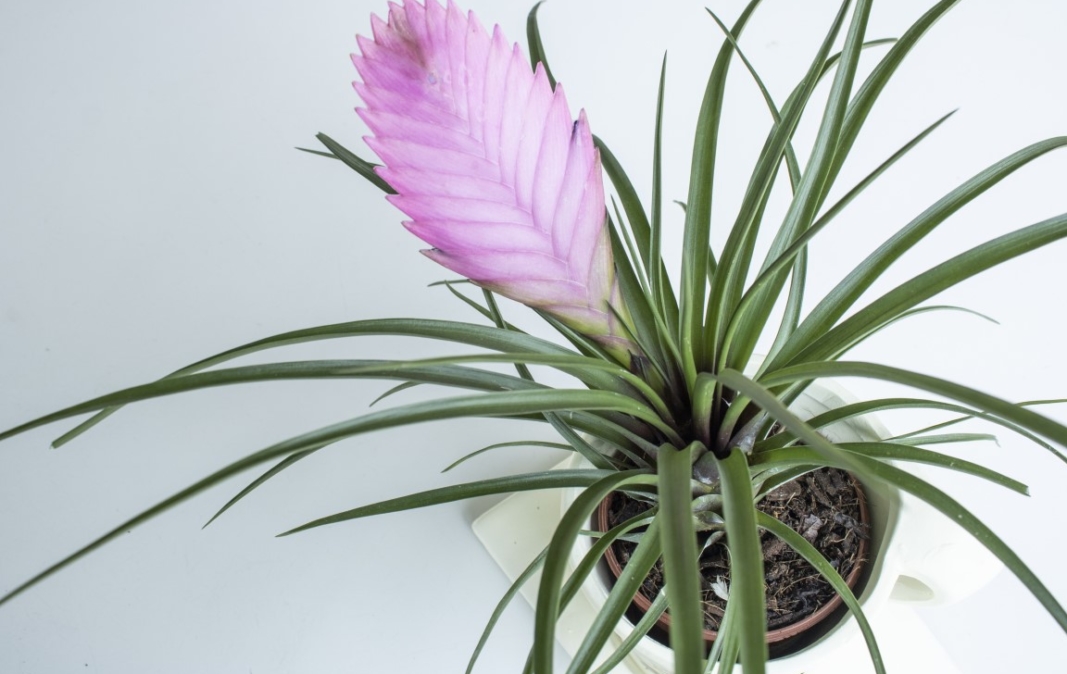
Tillandsia, often known as air plants, are a popular variety of houseplant that originates in Central and South America as well as some parts of the Southeastern United States. They are called air plants for good reason – they do not need roots. Instead, air plants absorb water and nutrients through their leaves from the surrounding air. This makes them incredibly popular, as they can be used in all variety of décor. Hang them from the ceiling, attach them to a wall, or set them on a table, and they will do just fine wherever you place them without soil – provided you meet a few conditions. 

Before reading on – note that the lifespan of most tillandsia is several years, and they only bloom once in their lifecycle. 1-2 months after blooming, new plants, called pups, form around the original. These will bloom eventually, so with a bit of care, you can keep your plants going for years. 

Light Requirements

When thinking about the environmental conditions needed by houseplants, it is always helpful to consider their natural environment. Air plants often grow on trees or in moist areas with partial shade. In these conditions, they receive bright, indirect light. This means that indoors they do best in high light environments. Rooms with southern or eastern facing windows are best.

If you lack a southern or eastern facing window, others will also work, you just need to keep a few things in mind. If your plant is in a western facing window, beware of frying your air plant in the intense afternoon sun. North-facing windows get less light, so place the plant close to the window. 

Watering

In general, you can plan to water tillandsia 1-2 times a week. However, you will need to take the environmental conditions into account and adjust accordingly. Before watering, think about the answers to these questions:

  • How much light will my air plant get, and at what time of day? 
  • What is the temperature in the space where my air plant is located?
  • How humid is the space?

Air plants that get afternoon sun in a western window in your living room will need more frequent watering than air plants  in a southern facing window in your bathroom, as the sun is less hot when coming from the south, and mist from the shower provides plenty of humidity for the plant. If the air plant will be dryer space, in an area near a heater for example, it will need watering more frequently. 

Air Plant, Tillandsia ionantha, greenhouse, Istock

How to Water an Air Plant

  1. Bi-weekly under a kitchen or bathroom faucet, run lukewarm water over your tillandsia until thoroughly soaked. 
  2. Then turn upside down and shake off excess water.
  3. Return your plant to it’s display.

Some notes about watering:

  • Be careful with bulbous air plants (they have visible bulbs at the base) if too much water stays at the base of the plant, the plants will rot.
  • In between watering, you can lightly mist your air plants to keep them a healthy vibrant green as they soak up water.
  • Once or twice a month, you can spray a little bit of Tillandsia fertilizer on your air plants to keep them thriving.
  • Be careful not to overwater your air plants. When the base of the plant becomes a brown/black color or the leaves begin to fall out from the center, the plant has rotted.
  • Usually if the tips of the leaves turn crispy and brown, the plant isn’t getting enough water. Additionally, when the plant isn’t getting enough water, its naturally concave curved shape will become accentuated.

Get Creative with Air Plant Décor

Air plants grow naturally in trees, so using driftwood as a display piece for your favorite tillandsia is a wonderful way to show them off in a more natural setting.

Tillandsia, Air Plant, Istock

Since they do not need soil, you can get as creative as you want in designing art with your plants. We love this idea from Balcony Garden Web’s post, “51 Most Amazing Air Plant Display Ideas.

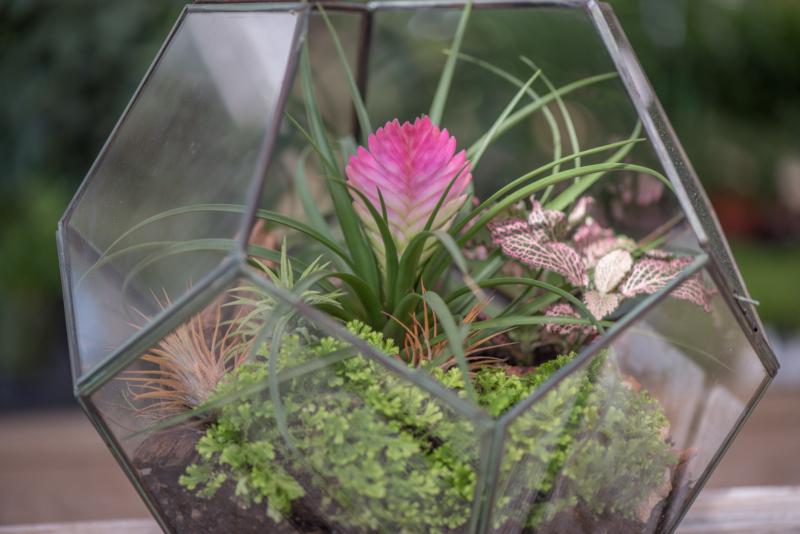
And of course, their is always the classic option to put them in terrariums. You can use them as a feature plant, or add them in as a decorative element with other plants. 

Not sure about how to care for your air plant or what you want to get? Call or visit one of our Merrifield locations to speak with a plant specialist to find out what suits your home environment the best!

Created something cool using air plants? We would love to see it! Share with us on Instagram or Facebook and tag @merrifieldgardencenter for a chance to be featured on our page.

Create Your Own Fresh-Cut Floral Arrangement

Fresh flower arrangements are a wonderful way to bring the outdoors in and transform your space seasonally with fresh blooms and greens. This step-by-step guide covers spring blooms, but you can use the guidelines to select and arrange flowers from any season in a beautiful arrangement for your home.

What You Need

Blooms, Branches and Greenery

  • Linear blooms and branches (we used mulberry-4, and baptisia-7)
  • Fill greenery (we used hellebores-1, heuchera-6, climbing hydrangea-3, and lambs ear-5)
  • Focal flowers (we used garden roses-2)

Supplies

  • Decorative vessel of your choice (for a table centerpiece, the vessel should be about 1/6 the diameter or length of the table)
  • Floral foil or heavy-duty aluminum foil
  • Oasis or floral design tape
  • Two to three buckets/containers filled with warm water (you can use anything large enough to hold all your cut plants)
  • Floral food
  • Pruners
  • Floralife Clear Crowning Glory® spray

Step One: Select Your Vessel and Flowers

When arranging flowers for a dining table centerpiece, the maximum length of the full arrangement should be about a third of the table’s length. An appropriately sized vessel will be one-third of this measurement, or a sixth of the overall table length. Of course, this is not a requirement! Select a vessel and arrangement size that suits your taste and decor, and line it with floral foil or a heavy duty aluminum foil to protect your vessel.  

Select plants from your garden to enjoy indoors, or visit your local florist for flowers. Choose plants in good condition with healthy foliage. Flowers should have just opened or be in bud form. 

If you are cutting stems from your own garden, bring your bucket of warm water with you if possible, and cut your flowers from the garden in the morning when the weather is cooler. The heat later in the day can shock cut stems and cause them to wilt. After cutting your stems, put them in your warm water with floral food right away. The floral food controls bacteria levels and assists the stems with the absorption of water.

If you can’t bring a bucket of warm water outside to the garden with you, re-cut your stems an inch above your cut line before placing them in warm water inside. Leave the clipped flowers in the warm water with the floral food for about 30 minutes to give the stems time to condition.

Step Two: Prepare the Oasis

Cut your oasis block to a size that fits your vessel shape without compressing the oasis. A compressed oasis will not hold water, so this is an important step to ensure your arrangement lasts.

After sizing your oasis, soak it in water and floral food for 30 minutes using a bucket or sink, then place it in the vessel. 

Step Three: Arrange Structural Blooms

Place your branches or structural blooms, in our case mulberry and baptisia, to create the lines and overall movement for your arrangement. It’s best to begin with the highest point first. Keep in mind the viewpoint from which your arrangement will be enjoyed when deciding where your flowers should go. Some arrangements will be viewed from all sides, while others may be against a wall and only visible from 3 sides. 

Step Four: Place Greens and Fill Flowers

Using your filler greens (the hellebores in this arrangement), start around the perimeter or your arrangement and move inwards as you place them to fill in the overall shape. Keep it light, and avoid overcrowding so that room remains for the focal flowers. You can always go back and add more as desired after placing the focal flowers. 

Step Five: Place Your Focal Flowers

When placing your focal flowers (garden roses in this arrangement), think in triangles. Triangular shapes provide dimension and keep your eye moving throughout the arrangement. You want to avoid having your focal flowers make a line. 

Step Six: Hide the mechanics

Using complementary fill flowers or greenery (heuchera, lambs ear, and climbing hydrangea in this arrangement), hide the oasis, floral tape, and other ‘mechanics’ of the floral arrangement and highlight your focal flowers.

Step Seven: Preserve Your Arrangement

When your arrangement is complete, spray it with Crowning Glory preservative. This helps the plants hold in moisture, keeping flowers more vibrant.

To keep your arrangement fresh for as long as possible, flush the arrangement with water every other day and keep out of direct sunlight.

To flush the arrangement, place the vessel in the sink with water entering just inside the edge of the vessel, and leave the water running for a few minutes. The force of the running water will push out the old water and any floating debris out of your container. We recommend flushing the water at night so you can leave it to drip dry overnight.

If you make your own Fresh Cut Arrangement using these instructions, we would love to see it! Please share on Instagram and tag @merrifieldgardencenter for a chance to be featured on our page

DIY Potted Orchid Garden

As elegant greenhouse plants, orchids and ferns thrive year-round, and make the perfect plants for garden fresh arrangements. Elegant and timeless, they can be used for any occasion, or just to bring a fresh update to your home at any time of the year. These arrangements are simple to make in just a few steps, and with a little care and attention, anyone can keep an orchid and fern garden for years to come.

To create this arrangement, here is what you will need:

Supply List

For a centerpiece arrangement

  • Decorative vessel – approximately 10 inches in diameter
  • 1 or 2 orchids in 4 inch pots
  • Two assorted ferns in 4” pots (we used maidenhair ferns) 

For a grand entryway arrangement

  • Decorative vessel – approximately 20 inches in diameter
  • 2 orchids in 4 inch pots
  • 1 orchid in a 6 inch pot
  • 3 ferns in 4 inch pots

For both centerpiece and grand entryway arrangements

  • Moss to cover your orchid and fern grow pots (we used preserved sheet moss)
  • Branches (we used white birch)
  • Raffia or wire to tie the orchid to the support branches
  • Floral foil or heavy-duty aluminum foil
  • One block of sahara foam and a knife to cut it
  • Pruners
  • Spray bottle or small watering can

Step One: Prepare Your Vessel

Select a vessel that is about five inches deep to cover the orchid and fern grow pots. You can select any container meeting that requirement that suits your taste, and matches the decor of the location where it will be placed. After selecting a vessel, line the interior with floral foil or heavy-duty aluminum foil to protect the container.

Step Two: Arrange your Orchids and Ferns

Place the orchids slightly off-center, leaving them in their grow pots, to give your arrangement a more natural look. Afterwards, place the ferns in their grow pots around the orchids, angling them away from the orchids to fill the space around the perimeter and hide the orchid pots. Leaving the orchids and ferns in their respective pots allows each to be watered according to their individual requirements. 

Step Three: Cut and Place Sahara as Needed

If the container is deeper than the height of the potted orchids and ferns, place sahara under the pots to raise them to the desired height. After this is done, fill in any voids between the individual pots with sahara to stabilize the arrangement, and hold it firmly in place.

Step Four: Prepare and place the moss

Lightly spray the moss with water, and arrange it in the display. Dampening the moss makes it easier to manipulate and arrange, and also prevents it from making a mess. The moss serves as a beautiful way to cover the ‘mechanics’ of the garden, including grow pots, sahara and empty space between the orchids and ferns. 

Step Five: Add Branches for Support

Not only do branches add drama to garden arrangements, they also help support the heavy orchid blooms. Place your branches in the orchid pots and tie them to the stems of your orchids using rafia or wire.

Caring for Your Potted Orchid Garden

For best results, keep your potted orchid garden in bright, indirect light.

Water each type of plant in your orchid garden according to the individual care instructions for that plant. The ferns, for example, will prefer a thorough watering a few times a week, depending on the time of year. Orchids generally prefer a thorough watering about every two weeks. 

For additional information, check out some of our previous blog posts such as orchid care for beginners and the basics of caring for houseplants.

If you make your own Potted Orchid Garden using these instructions, we would love to see it! Please share on Instagram and tag @merrifieldgardencenter for a chance to be featured on our page