Tag Archive for: roses

Selecting and Caring for Roses

By Sharon Stickell and Rob Capp

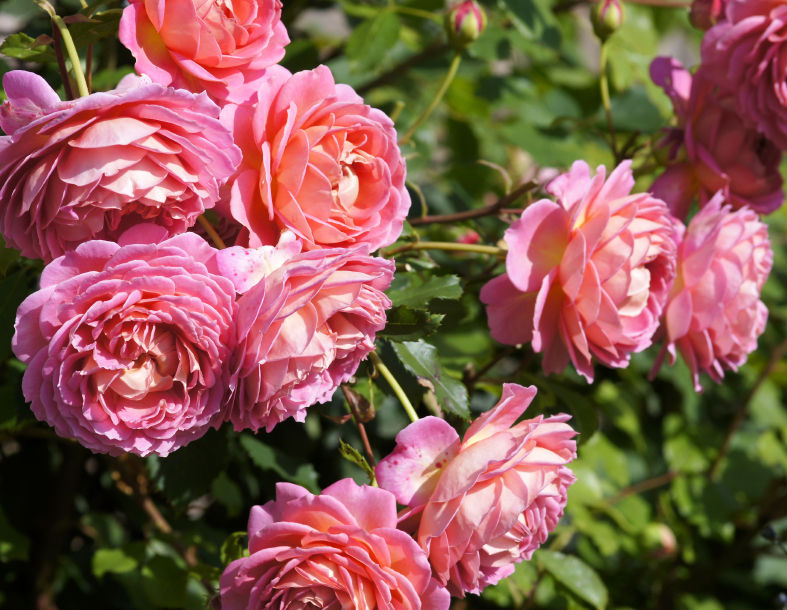
One of the most traditional and iconic garden plants, the rose is known for its beauty, classic appeal and continuous, repeat blooming from spring through frost. Today, there are over 100 species and thousands of cultivars, providing a limitless abundance of options which can be a bit overwhelming for gardeners new to growing these beautiful plants. The choices can be a bit overwhelming for those of us who are selecting roses for the first time – but with our guide to selecting roses, you can select one that will work well for you and your garden!

General Care

Regardless of the rose you select, there are a few guidelines which apply to all types.

  • Roses need at least 6 hours of direct sunlight.
  • Follow our planting instructions to plant your roses, adding a handful of super phosphate to promote root growth. If you are planting in containers fill in around the container with Merrifield Potting Mix or organic alternative, then mix one or two cups of dehydrated manure and a tablespoon of super phosphate.
  • When watering your roses, follow our watering guidelines. We recommend using a 12-inch bamboo stake or dowel rod to check for moisture more deeply than other plants. Water in the morning to ensure that the water evaporates from the leaves during the day, as water sitting on the leaves overnight can promote disease.
  • Roses require a generous amount of fertilizer. From the first signs of leaf break (usually in April) to August, fertilize every 4-6 weeks with Merrifield Flowering Plant Food or an organic alternative, such as Rose Tone.
  • Mulch around your rose according to our proper mulching guidelines. Keep mulch an inch or two away from the crown of the plant.

Selecting the Right Rose

ISTOCK Climbing Rose

Climbing Rose

Use these roses as an accent along fences or on arbors or pergolas by training them to grow in the way that you choose. These vigorous growers flower on wood that is at least two years old. Some are ever-blooming. They will need the support of an arbor, fence, or trellis as they grow.

Knockout Rose

Shrub Rose

Generally the easiest to grow, shrub roses are tough, hardy and more disease resistant than other varieties. These roses range in height from 2 feet to 8 feet and can be used in borders or hedges. Common varieties include the knock-out, drift and carpet roses.

David Austin

These are bushy, shrub type roses with a focus on fragrance and form. Most blooms are cottage or cabbage-like. These varieties are usually disease resistant.

Miniature Rose, Greenhouse

Miniature Rose

Perfect for patios, the front of borders, and containers, these small roses reach only 2 feet in height and bloom continuously from spring until November.

Floribunda Rose 'Scentimental'

Floribunda

These all-purpose roses generally grow to between 2 and 4 feet and bloom in clusters. Most bloom continuously from spring – frost. These are generally more disease resistant than other roses and can be used in borders, containers or in hedges.

Grandiflora Rose, Shrub

Grandiflora

These roses are similar to the Floribunda, but taller, and can reach about 6 feet in height. These vigorous bloomers produce clustered flowers at the end of each stem throughout the growing season. They work well in the back of a flower border or as a hedge.

Hybrid Tea Rose 'Chicago Peace'

Hybrid Tea

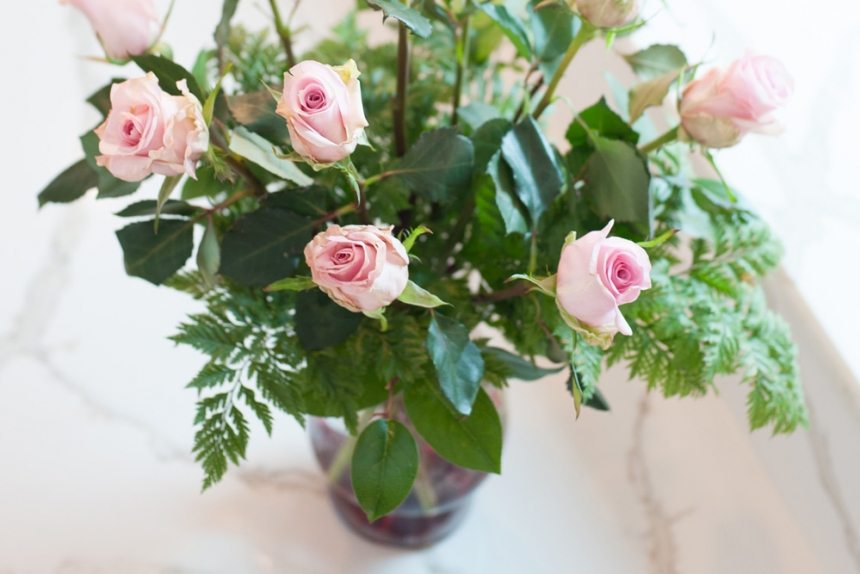
Producing single blooms at the end of their stems, these are the ideal to use as a cut flower. They can be used as a specimen plant or in a border or garden bed. These typically involve a little more care than other rose plants but produce the most magnificent flowers. They typically reach anywhere from 2 feet to 5 feet in height.

ISTOCK Rose Tree

Tree Rose

These specimen plants are generally grafted onto a tall rose trunk of hybrid tea quality and used as an accent plant growing in a container. They are more susceptible to winter damage since they have been grafted.

If you are looking for more information on the care of roses, check back soon for a post on pruning, pest management and winter care techniques.

Long Stem Rose Arrangement Valentine's Day

How to Arrange Your Valentine’s Roses in a Vase

Rose bouquets and arrangements are a beautiful and timeless Valentine’s Day gift. Arranging your own vase of roses and other flowers will make the display even more special and thoughtful. Luckily, you do not have to work in a flower shop to put together the perfect rose arrangement. Follow our step-by-step guide for a beautiful display in no time!

Step One: Prep Your Vase

Use floral tape to create a grid across the opening of your vase. Use three pieces of tape per direction.

Create a grid with floral tape

Step Two: Add Floral Preservatives

Floral preservatives inhibit the growth of bacteria, which allows the cells to absorb water. You can add these either before or after you tape your vase—whichever you prefer.Then, fill your vase three-fourths of the way with lukewarm water, letting the water agitate the preservative.

Step Three: Trim Your Greens

Trim any broken leaves and branches that are too low on the stems of your greens. Cut the ends of your green stems at least ¼” on a steep angle. Cutting at a steep angle creates more surface area through which the cells can draw in water. Place your greens in the vase within eight seconds of trimming (if you wait too long the cells fill with air and prevent the stem from drinking). Place two to three greens in the center of your vase.

Tips for arranging your roses: Trim any broken leaves and branches that are too low on the stems of your greens. Trim the ends of your green stems at least ¼” on a steep angle. Cutting at a steep angle creates more surface area through which the cells can draw in water. Place your greens in the vase within eight seconds of trimming (if you wait too long the cells fill with air and prevent the stem from drinking).

Step Four: Place the Rest of Your Greens

Trim and distribute the rest of your greens evenly around the vase, creating a collar to visually soften the lip of your container.

Tips on arranging your roses: Trim and distribute the rest of your greens evenly around the vase, creating a collar to visually soften the lip of your container.

Step Five: Prep Your Roses

Remove the roses from the floral tubes. Take off any unattractive or damaged rose petals and leaves. Take your longest stemmed rose and cut the stem at least ¼” on a steep angle using a sharp knife or floral scissors. It’s important that your cutting utensil is sharp—if your knife or scissors are dull they will crush the stem cells, inhibiting the flowers ability to draw water.

Tips for arranging your roses: Take off any unattractive or damaged rose petals and leaves. , Tips for arranging your roses: Take off any unattractive or damaged rose petals and leaves.

Step Six: Establish Height

Place the tallest and straightest rose in the center. This rose sets the height for the rest of the arrangement.

Tips on arranging your roses: Place the tallest and straightest rose in the center. This rose sets the height for the rest of the arrangement.

Step Seven: Add More Roses

Select the next five tallest stemmed roses. Trim them to be slightly shorter (about one or two inches) than your center rose, trimming as you did your center rose. Trim all five one at a time, to the same length, placing them in water within the eight second window. Place these roses in the vase by aiming their stem ends toward and around the center rose. These roses should be spaced equally apart.

Tips on arranging your roses: Select the next five tallest stemmed roses. Trim them to be slightly shorter (about an inch to two inches) than your center rose, trimming as you did your center rose. Trim all five roses one at a time, to the same length, placing them in water within the eight second window. Place these roses in the vase by aiming their stem ends toward and around the center rose. These roses should be spaced equally apart.

Step Eight: Place the Rest of Your Roses

Measure and cut the remaining six roses to be shorter than the center and middle roses. Again, trimming one at a time. Place your roses between the existing roses, toward the outside edge of your vase.

Tips on arranging your roses: Measure and cut the remaining six roses to be shorter than the center and middle roses. Again, trimming one at a time. Place your roses between the existing roses, toward the outside edge of your vase.

Step Nine: Incorporate Fill Flowers

Trim your fill flowers (such as baby’s breath, tree fern, wax flower, or limonium) and tuck them into your arrangement where you see gaps. Your fill flowers should be lower and deeper in the arrangement than your roses.

Tips on arranging your roses: Trim your fill flowers (such as baby’s breath, tree fern, wax flower, or limonium) and tuck them into your arrangement where you see gaps. Your fill flowers should be lower and deeper in the arrangement than your roses.Tips on arranging your roses into a bouquet | Merrifield Garden Center

For best results:

  • Place your arrangement in a cool spot, away from direct sunlight and heating vents.
  • Replace the water in your vase with room temperature water daily.
  • Re-cut the stems every-other-day to allow maximum water uptake and keep your roses from drooping.