Tag Archive for: edible gardening

Watermelon Gin Cocktail Blog

Watermelon Cucumber Gin Cocktail

By Lyndsey Bridgers, Marketing Director

There is nothing as delicious as perfectly sweet, chilled watermelon on a hot summer day. This thirst-quenching fruit always accompanies a delicious spread of grilled hot dogs, hamburgers and casseroles at my family’s Fourth of July cookout. To celebrate the Fourth of July this year, we’re whipping up one of our favorite cocktails using sweet watermelon and garden-grown cucumbers and basil.

I started by juicing my watermelon. I used a citrus press (mostly because I already had it out for making lemonade), but you can also use a blender and then strain it with a mesh strainer or cheesecloth into a jar. Afterwards, prepare your glass by running a lime wedge around the rim and rolling it in kosher salt. Set the glass aside.

In the bottom of a cocktail shaker, add your lime juice, elderflower liqueur, cucumber and basil and muddle using a muddler or a wooden spoon. Then, pour in your watermelon juice, gin/vodka and ice and shake vigorously.

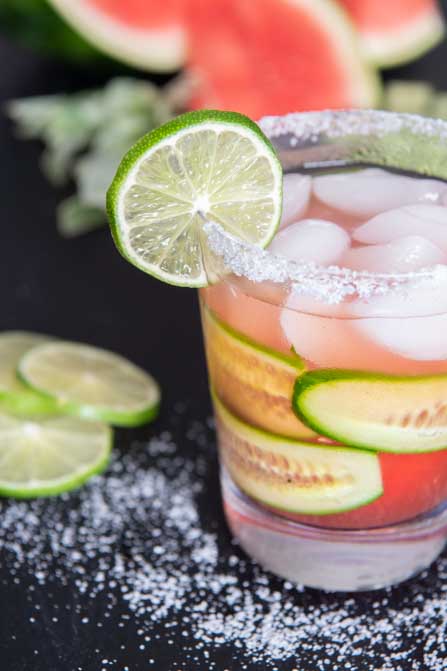
Add ice to your glass and strain in your cocktail and top with a lime wedge, cucumbers and sprig of basil. And enjoy!

Watermelon Cucumber Gin Cocktail Recipe

Ingredients (for two cocktails)

  • 1 ounce of lime juice (from two limes), with one wedge reserved  
  • 2 ounces of elderflower liqueur
  • 2 ounces of gin (or vodka)  
  • 6 ounces of watermelon juice (about three cups of cubed watermelon)
  • 6 slices of cucumber
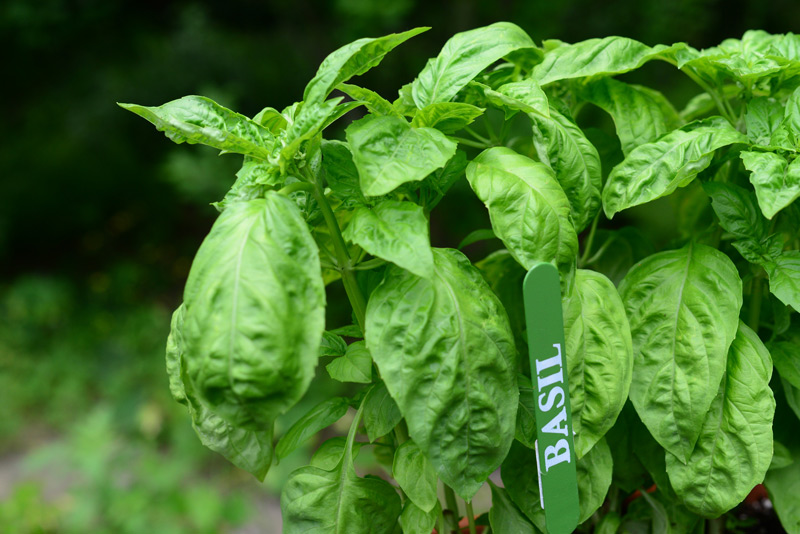
  • 6 basil leaves, plus two small sprigs for garnish
  • Kosher salt

Run a lime wedge over the rim of the glasses, then roll the rims in the kosher salt and set aside.

Add the cubed watermelon to a blender and puree until smooth. Pour the mix through a fine strainer or cheesecloth draped over a glass to separate the juice from the fiber of the fruit

Watermelon Gin Cocktail Blog

Add the basil leaves, 4 slices of cucumber, lime juice and elderflower liqueur to a cocktail shaker and muddle. Next, add your watermelon juice, gin and ice and shake until cold. Fill your cocktail glasses with ice, then strain the cocktail into the glasses. Garnish with sliced cucumbers and the basil sprigs and enjoy!

Looking for more garden fresh drinks for summer parties? Try out our herb infused lemonade!

Rosemary, Orgegano and Basil, Herbs

Easy to Grow Herbs

David Yost, Merrifield Plant Specialist

Herbs are a great way to take the plunge into growing your own edibles. They have a wide variety of uses, are easy to grow and fit very well even in small gardens! By establishing a herb garden on your patio, windowsill, or balcony you can reap the benefits of its fresh flavors and aromas all summer long.

Whether you are growing herbs indoors or out, it’s best to place them in a location where they will receive at least 6 hours of sunlight each day.

The following are some of the easiest types of herbs to grow:

Basil

A fast-growing herb, basil is a favorite among gardeners of all levels. Known for its rich peppery flavor and fresh aroma, it makes a great addition to pizza, pasta, salads and sauces. Basil does not need quite as much sun as other herbs and likes to be kept moist. When growing basil, be sure to prune the flowering tops to allow new leaf growth.

Chives

In addition to great flavor, chives have beautiful blooms. The leaves give a light spring onion flavor. This is probably the easiest herb to grow! To harvest it, simply cut at the base of the plant, one to two inches above the soil,  as if trimming grass and bring your fresh cut chives right to the kitchen. Do not cut more than a third of the plant off at a time to allow healthy regrowth.

Mint

Mint gives off a strong aroma and flavor that can be used in appetizers, entrées, desserts and cocktails. Try adding it to homemade tzatziki or steeping to make tea. Mint is an aggressive spreader, so you will want to plant it separately from your other herbs in a pot or container. To harvest mint, cut the stems up to one inch from the ground or just pick the leaves as you need.

Rosemary

Delicious fresh and dried, rosemary brings wonderful flavor to your meat and poultry dishes all year long. This herb is drought tolerant and requires little maintenance, making it a great option for gardener’s who travel frequently or have a tendency to neglect their plants. There are many varieties of rosemary. Look for winter-hardy varieties such as Arp Rosemary, Trailing Rosemary and Salem Rosemary. When gathering rosemary, pick the new, fresh growth at the top of the plant, leaving the old stalk alone.

 Oregano

Oregano is a great choice if you love cooking Italian food. This herb’s flavor is strongest during the summer, and it is very to grow at home. You can harvest oregano leaves as you need them. The leaves have the best flavor flavor right before the flowers bloom in the summer.

Lavender

Lavender’s vibrant color and lovely scent will make your herb garden pop. This versatile herb can be used in baking, cooking, teas, candles and even in a variety of home remedies. It is very easy to grow, just plant it in well-drained soil and your lavender will flourish. When harvesting, treat it the same as rosemary, leaving the old stalk alone and cutting off newer growth.

Thyme

Thyme is great to use when cooking meats and vegetables. This low-maintenance herb thrives when you let it be and allow nature to take its course. Collect thyme leaves as you need them, although they will be packed with the most flavor in the summer just before the plants bloom.

ISTOCK Tomato

Vegetable Gardens in Small Spaces: Tomatoes

David Yost, Merrifield Plant Specialist

Tomatoes are one of the most popular fruits and vegetables among gardeners as they are both beautiful and delicious! Even if you have limited space, you can grow beautiful tomatoes with a container, adequate sunlight and a little planning.

Tomatoes can grow in a variety of conditions, but will produce the best fruit in a location with 6 to 8 hours of sun per day. Before you begin your tomato container garden, check your yard or patio at a few different times throughout the day to determine the best location for your plant.

Step one: Choose your tomato

You can grow just about any kind of tomato in a container if you are willing to work with vines that can reach 8 feet tall or more. I like to grow the Celebrity variety in containers for its hardiness, flavor and manageable size. ‘Celebrity’ typically grows to about 5 feet, making it a manageable choice.

Step two: Gather your supplies

Before you begin planting, you will want to make sure you have the following items:

  • Container: Your container should be a minimum of 16” in diameter for one tomato plant. With tomatoes, bigger is always better when it comes to containers. Today I’m using a plastic pot, but you can use almost any container as long as it has a hole in the bottom for drainage. You can also use an EarthBox, which has a sub-irrigated watering system that can increase time between watering.
  • Potting soil: We recommend using a lightweight potting soil, such as Pro Mix Organic Vegetable and Herb, for container-grown tomatoes. For one tomato plant in a 16” pot, you will need two 16 qt. bags of potting mix.
  • Small square of landscape fabric: Place this over the drainage hole in the bottom of the pot to prevent soil from escaping and keep your patio clean. This will also prevent critters from coming into the pot.
  • Tomato cage or other support structure: To keep your tomato contained within the pot, we recommend using a tomato cage or a plant stake to support the vine.
  • Fertilizer: I like to use an organic fertilizer, such as Espoma Tomato Tone, for my edible gardens. You can also use an inorganic, slow release granular, such as our Merrifield Flowering Plant Food or Osmocote.
  • Granular lime: I like to mix lime in with my tomatoes to prevent disease and boost growth.
  • Squirrel repellent: I have lots of squirrels in my yard so I use a squirrel repellant to discourage them from tampering with my tomato plant. I like the I Must Garden brand as it’s organic.
  • River jack stones or seminole chips: You’ll use these to cover the top of the container surface. This will protect your plants from squirrels and preventing dirt from washing out of the top of the pot.
  • Hand shovel
  • Gardening gloves
  • Watering wand and hose

Step three: Plant

Since your container can be heavy once its filled with the soil, we recommend setting the container in place before you plant your tomatoes.

  1. Place your piece of landscape fabric over the drainage hole in the bottom of the pot.
  2. Fill your container 2/3 of the way with potting soil.
  3. Add your fertilizer and lime to the potting soil and mix with your hand shovel. Be sure to follow the instructions on the label to determine the appropriate amount of fertilizer and lime to mix in.
  4. Add your tomato plant. Break up the roots and remove the bottom set of leaves before placing your plant in the pot. You can cover your tomato with soil all the way up to the second set of leaves.
  5. Top off the container with soil, but keep it an inch from the top of the container to keep it from spilling over the sides as you water.
  6. Place your tomato cage in the pot. You will want to do this right after planting to prevent the cage from damaging the root system of the tomato.
  7. Cover the surface of the soil with a half-of-an-inch of small river jacks or seminole chips.
  8. As an extra layer of protection, spray your tomato with squirrel repellent.

Step four: Water and nourish

Once your container is set, water it thoroughly. Run the water over your container, letting it drain out of the bottom. Tomato plants need to be watered frequently to maintain consistent moisture in the soil. The soil should not be allowed to dry out. During hot weather, you will likely need to water your tomato plant daily.

For the best tomatoes, we recommend feeding your plant every 2-4 weeks with fish emulsion.

Your plant will be ready to harvest later this summer, and will continue to produce fruit through the end of the season.