Tag Archive for: floral arrangement

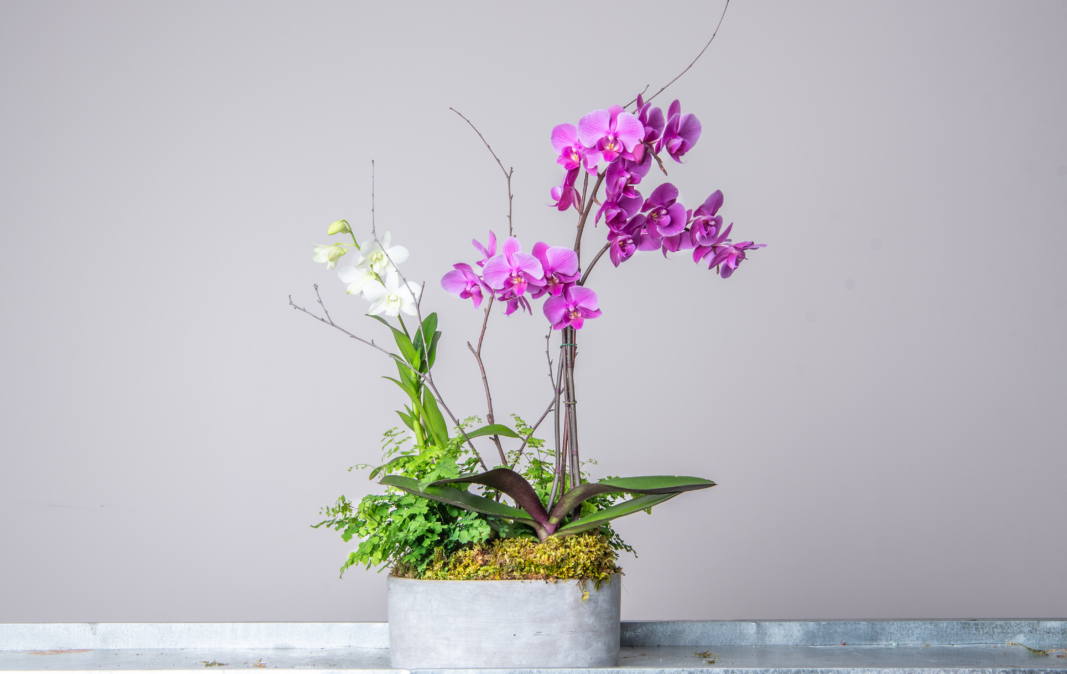
DIY Potted Orchid Garden

As elegant greenhouse plants, orchids and ferns thrive year-round, and make the perfect plants for garden fresh arrangements. Elegant and timeless, they can be used for any occasion, or just to bring a fresh update to your home at any time of the year. These arrangements are simple to make in just a few steps, and with a little care and attention, anyone can keep an orchid and fern garden for years to come.

To create this arrangement, here is what you will need:

Supply List

For a centerpiece arrangement

  • Decorative vessel – approximately 10 inches in diameter
  • 1 or 2 orchids in 4 inch pots
  • Two assorted ferns in 4” pots (we used maidenhair ferns) 

For a grand entryway arrangement

  • Decorative vessel – approximately 20 inches in diameter
  • 2 orchids in 4 inch pots
  • 1 orchid in a 6 inch pot
  • 3 ferns in 4 inch pots

For both centerpiece and grand entryway arrangements

  • Moss to cover your orchid and fern grow pots (we used preserved sheet moss)
  • Branches (we used white birch)
  • Raffia or wire to tie the orchid to the support branches
  • Floral foil or heavy-duty aluminum foil
  • One block of sahara foam and a knife to cut it
  • Pruners
  • Spray bottle or small watering can

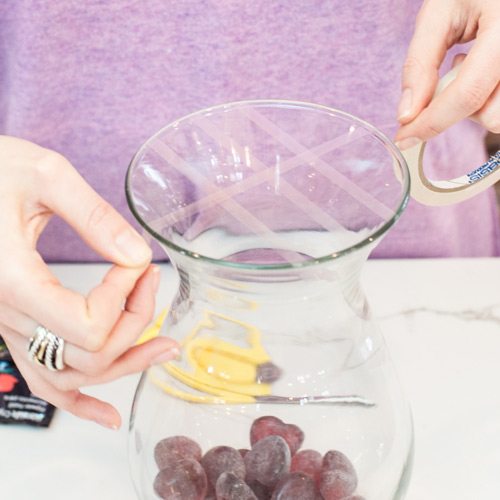
Step One: Prepare Your Vessel

Select a vessel that is about five inches deep to cover the orchid and fern grow pots. You can select any container meeting that requirement that suits your taste, and matches the decor of the location where it will be placed. After selecting a vessel, line the interior with floral foil or heavy-duty aluminum foil to protect the container.

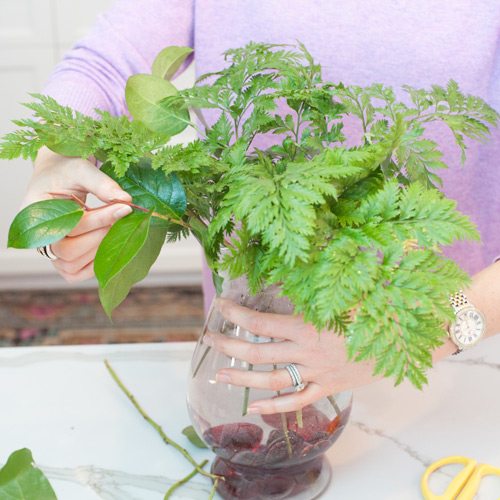
Step Two: Arrange your Orchids and Ferns

Place the orchids slightly off-center, leaving them in their grow pots, to give your arrangement a more natural look. Afterwards, place the ferns in their grow pots around the orchids, angling them away from the orchids to fill the space around the perimeter and hide the orchid pots. Leaving the orchids and ferns in their respective pots allows each to be watered according to their individual requirements. 

Step Three: Cut and Place Sahara as Needed

If the container is deeper than the height of the potted orchids and ferns, place sahara under the pots to raise them to the desired height. After this is done, fill in any voids between the individual pots with sahara to stabilize the arrangement, and hold it firmly in place.

Step Four: Prepare and place the moss

Lightly spray the moss with water, and arrange it in the display. Dampening the moss makes it easier to manipulate and arrange, and also prevents it from making a mess. The moss serves as a beautiful way to cover the ‘mechanics’ of the garden, including grow pots, sahara and empty space between the orchids and ferns. 

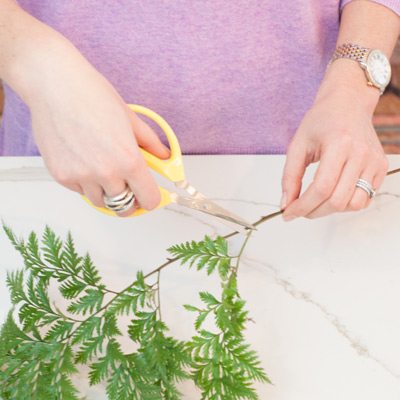
Step Five: Add Branches for Support

Not only do branches add drama to garden arrangements, they also help support the heavy orchid blooms. Place your branches in the orchid pots and tie them to the stems of your orchids using rafia or wire.

Caring for Your Potted Orchid Garden

For best results, keep your potted orchid garden in bright, indirect light.

Water each type of plant in your orchid garden according to the individual care instructions for that plant. The ferns, for example, will prefer a thorough watering a few times a week, depending on the time of year. Orchids generally prefer a thorough watering about every two weeks. 

For additional information, check out some of our previous blog posts such as orchid care for beginners and the basics of caring for houseplants.

If you make your own Potted Orchid Garden using these instructions, we would love to see it! Please share on Instagram and tag @merrifieldgardencenter for a chance to be featured on our page

Long Stem Rose Arrangement Valentine's Day

How to Arrange Your Valentine’s Roses in a Vase

Rose bouquets and arrangements are a beautiful and timeless Valentine’s Day gift. Arranging your own vase of roses and other flowers will make the display even more special and thoughtful. Luckily, you do not have to work in a flower shop to put together the perfect rose arrangement. Follow our step-by-step guide for a beautiful display in no time!

Step One: Prep Your Vase

Use floral tape to create a grid across the opening of your vase. Use three pieces of tape per direction.

Create a grid with floral tape

Step Two: Add Floral Preservatives

Floral preservatives inhibit the growth of bacteria, which allows the cells to absorb water. You can add these either before or after you tape your vase—whichever you prefer.Then, fill your vase three-fourths of the way with lukewarm water, letting the water agitate the preservative.

Step Three: Trim Your Greens

Trim any broken leaves and branches that are too low on the stems of your greens. Cut the ends of your green stems at least ¼” on a steep angle. Cutting at a steep angle creates more surface area through which the cells can draw in water. Place your greens in the vase within eight seconds of trimming (if you wait too long the cells fill with air and prevent the stem from drinking). Place two to three greens in the center of your vase.

Tips for arranging your roses: Trim any broken leaves and branches that are too low on the stems of your greens. Trim the ends of your green stems at least ¼” on a steep angle. Cutting at a steep angle creates more surface area through which the cells can draw in water. Place your greens in the vase within eight seconds of trimming (if you wait too long the cells fill with air and prevent the stem from drinking).

Step Four: Place the Rest of Your Greens

Trim and distribute the rest of your greens evenly around the vase, creating a collar to visually soften the lip of your container.

Tips on arranging your roses: Trim and distribute the rest of your greens evenly around the vase, creating a collar to visually soften the lip of your container.

Step Five: Prep Your Roses

Remove the roses from the floral tubes. Take off any unattractive or damaged rose petals and leaves. Take your longest stemmed rose and cut the stem at least ¼” on a steep angle using a sharp knife or floral scissors. It’s important that your cutting utensil is sharp—if your knife or scissors are dull they will crush the stem cells, inhibiting the flowers ability to draw water.

Tips for arranging your roses: Take off any unattractive or damaged rose petals and leaves. , Tips for arranging your roses: Take off any unattractive or damaged rose petals and leaves.

Step Six: Establish Height

Place the tallest and straightest rose in the center. This rose sets the height for the rest of the arrangement.

Tips on arranging your roses: Place the tallest and straightest rose in the center. This rose sets the height for the rest of the arrangement.

Step Seven: Add More Roses

Select the next five tallest stemmed roses. Trim them to be slightly shorter (about one or two inches) than your center rose, trimming as you did your center rose. Trim all five one at a time, to the same length, placing them in water within the eight second window. Place these roses in the vase by aiming their stem ends toward and around the center rose. These roses should be spaced equally apart.

Tips on arranging your roses: Select the next five tallest stemmed roses. Trim them to be slightly shorter (about an inch to two inches) than your center rose, trimming as you did your center rose. Trim all five roses one at a time, to the same length, placing them in water within the eight second window. Place these roses in the vase by aiming their stem ends toward and around the center rose. These roses should be spaced equally apart.

Step Eight: Place the Rest of Your Roses

Measure and cut the remaining six roses to be shorter than the center and middle roses. Again, trimming one at a time. Place your roses between the existing roses, toward the outside edge of your vase.

Tips on arranging your roses: Measure and cut the remaining six roses to be shorter than the center and middle roses. Again, trimming one at a time. Place your roses between the existing roses, toward the outside edge of your vase.

Step Nine: Incorporate Fill Flowers

Trim your fill flowers (such as baby’s breath, tree fern, wax flower, or limonium) and tuck them into your arrangement where you see gaps. Your fill flowers should be lower and deeper in the arrangement than your roses.

Tips on arranging your roses: Trim your fill flowers (such as baby’s breath, tree fern, wax flower, or limonium) and tuck them into your arrangement where you see gaps. Your fill flowers should be lower and deeper in the arrangement than your roses.Tips on arranging your roses into a bouquet | Merrifield Garden Center

For best results:

  • Place your arrangement in a cool spot, away from direct sunlight and heating vents.
  • Replace the water in your vase with room temperature water daily.
  • Re-cut the stems every-other-day to allow maximum water uptake and keep your roses from drooping.