Tag Archive for: small space

Container Gardens for Butterflies and Hummingbirds

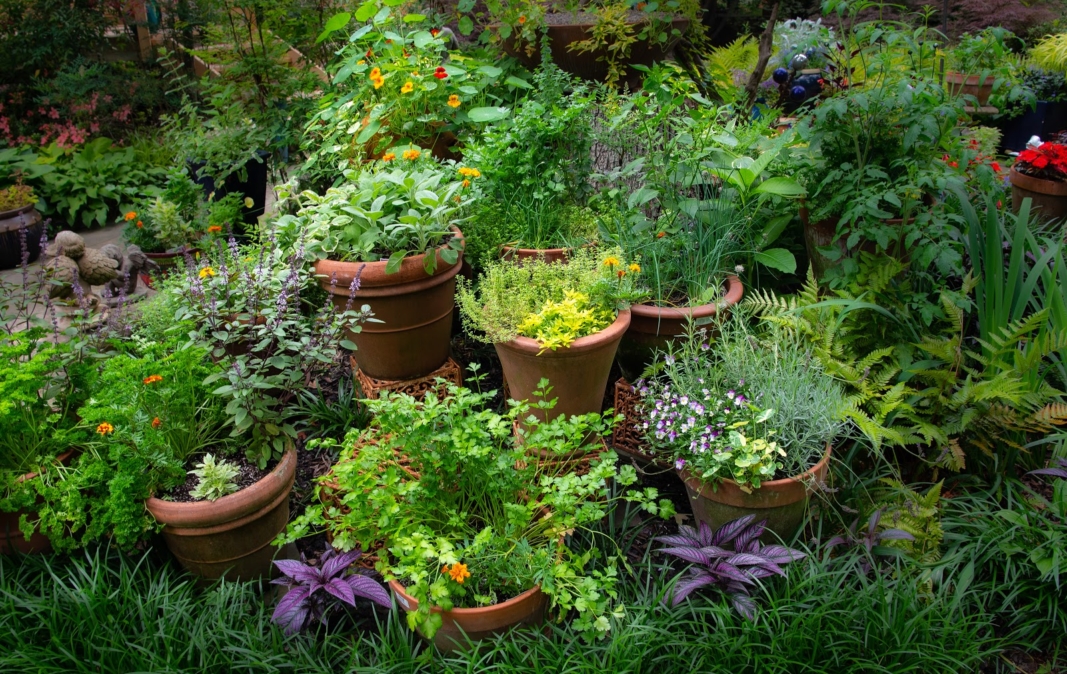
Summer is here, and so are the hummingbirds and butterflies we love to enjoy in our gardens. Even with a small space you can plant blooms in containers to encourage local butterflies and hummingbirds to stop in for a visit. 

For more information on pollinators:

In this post, we will primarily discuss summer plants for pollinators that grow well in containers. If you want to learn more about supporting local birds, bees and butterflies, you may be interested in our posts on hosting native caterpillars, planting for pollinators year-round, or attracting hummingbirds.

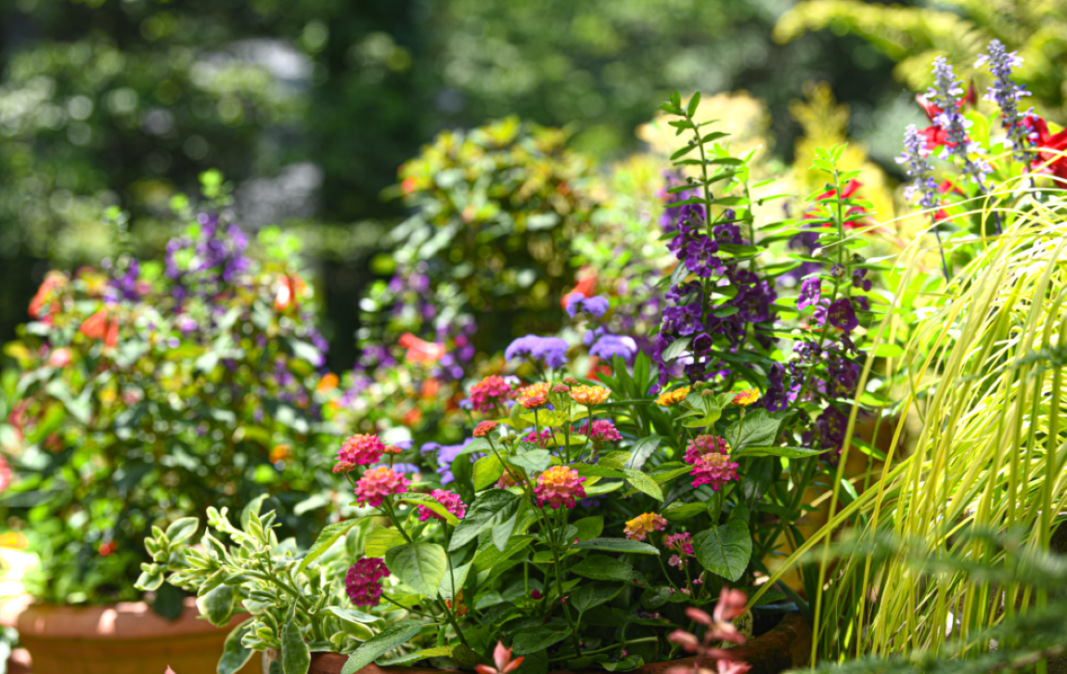
This purple pollinator container garden features petunias, angelonia, ageratum and gomphrena (design by Peg Bier, Merrifield Plant and Design Specialist).

Selecting Plants for Your Container Garden

Butterflies and hummingbirds both eat nectar from flowers. Both hummingbirds and butterflies will be attracted to brightly colored flowers whose nectar has a high sugar content.

Butterflies prefer blooms with flat landing pads where they can easily land to sip nectar. Hummingbirds prefer blooms that are accessible by their long beak while still in flight. Every gardener will have their own favorites and plants that they swear by, but here are some popular favorites we all agree on for the summer:

Perennials

  • Agastache
  • Asclepias (Butterfly Weed)
  • Coneflower
  • Coreopsis
  • Gaillardia
  • Gaura
  • Heuchera

Annuals

  • Angelonia
  • Begonia
  • Calibrachoa
  • Crossandra
  • Cuphea
  • Dahlia
  • Fuschia
  • Gomphrena
  • Lantana
  • Pentas
  • Petunia
  • Salvia
  • Zinna

There are many plants to choose from, but you may find that your local hummingbirds and butterflies prefer certain types of flowers.

This pollinator container garden features salvia, angelonia and lantana (design by Peg Bier, Merrifield Plant and Design Specialist).

Container Combinations

When creating a pollinator container, your creativity is just about your only limit. While you will want to use mostly pollinator plants, it is perfectly fine to combine other plants you love into your containers as well. Here are some ideas to get you started!

Fresh Pink and White

This combination of pink and white flowers looks natural while maintaining a curated color combination of pink and white blooms. This fresh, vibrant container combines perennial coneflower and heuchera with annual lantana, angelonia and pentas.

Vibrant Red and Yellow

This container makes use of deep burgundy coleus to bring together the vibrant red and yellow blooms. For this combination, you will need perennial coreopsis and euphorbia with annual dahlia and coleus.

Bold Multicolor

This bright, bold container includes salvia, crossandra, gomphrena, cleome and portulaca.

Herb Container Garden Collection

Creating Herb Gardens with Containers

Peg Bier, Merrifield Plant Specialist

There is value in seeing new possibilities when something you cherish dies. In this case, I recently had to remove a very old, large oak just off my deck. Where shade was present before, now there is sun. When the oak tree stood, my herb garden was in what I call my “South 40,” some distance from my kitchen, but the removal of this old tree has given me the opportunity to try moving it to a new location.

Now, in place of the tree, I have a large group of pots containing the herbs I love most and a lot of others I enjoy for their fragrance or use in cooking. They are within easy reach of my kitchen, which is ideal. I planted a cascading Japanese maple in a very large clay pot, and placed it on top of the 2 foot tall stump, thus creating a new staging area in the garden. On the shadier side of the tree stump, I’ve completed my new garden space with a large collection of annuals that are favorites of the birds and butterflies.

This type of herb garden is also something that can be achieved in small spaces. Even a sunny balcony can support a few of your favorite herbs.

Life in the garden is a learning curve and over time I have experimented with many things as I try to find the absolute best way to grow herbs. This time I am using four different potting soils for evaluation. Merrifield, Pro-mix, Espona and Foxfarms. So far they are doing equally well! After I place a piece of landscape fabric over the drainage hole, I incorporate a handful of organic Plantone, and a half handful of Greensand, Rock phosphate, and Gypsum into the soil mix. This has been working well for me, but may not be necessary for all gardeners.  Herbs don’t need too much fertilizer so I will observe to determine whether they need more during the growing season. I always hold the potting mix 2” from the top and cover with 1⁄2” small gravel (⅜” River Jacks) or Pea Gravel will work. This deters squirrels from digging and keep the soil in the pot when watering.

Herb Container Garden Collection

I choose large pots, most in excess of 16” because watering is easier. Small pots require closer monitoring. Water deeply so that the entire root ball is saturated and then again when soil begins to dry. Find that happy medium between too wet and too dry, and maintain with the proper amount of fertilizer. 

Plant the plants you love and will use frequently to cook with. I was born in the deep south where too many things were fried. Herbs came to my rescue and I learned to savor the various flavors they gave to a dish. Yes, fried chicken is a must now and then, but I rarely fry anything now. Salmon grilled with thyme and fresh dill is a party in your mouth!

Several herbs can be planted together in one large pot or the pot can be devoted to just one. I will have fresh young plants waiting in the wings for parsley, dill, and basil as they will not last the full season. I grow several varieties of Basil (sweet, thai, columnar and african), sage, thyme, oregano, chives, rosemary, lavender, and tarragon.

Container Garden with Herbs

Nasturtiums and marigolds provide color, are edible and beautiful garnish.

I did include cherry tomato and a habanero pepper plant. I hope the deer don’t harvest those! Herbs repel somewhat, are not tasty to deer, and cannot be sprayed with Bobbex, a natural spray that saves my other tasty (to deer) plants.

And so, where there is disappointment in a major loss of a big tree, I am now enjoying a particularly attractive and useful garden right under my nose. Yes, there is much fragrance and sensory delight! Harvest frequently and enjoy the organic, chemical free, delightfully tasty and diverse flavors of the garden!

ISTOCK Tomato

Vegetable Gardens in Small Spaces: Tomatoes

David Yost, Merrifield Plant Specialist

Tomatoes are one of the most popular fruits and vegetables among gardeners as they are both beautiful and delicious! Even if you have limited space, you can grow beautiful tomatoes with a container, adequate sunlight and a little planning.

Tomatoes can grow in a variety of conditions, but will produce the best fruit in a location with 6 to 8 hours of sun per day. Before you begin your tomato container garden, check your yard or patio at a few different times throughout the day to determine the best location for your plant.

Step one: Choose your tomato

You can grow just about any kind of tomato in a container if you are willing to work with vines that can reach 8 feet tall or more. I like to grow the Celebrity variety in containers for its hardiness, flavor and manageable size. ‘Celebrity’ typically grows to about 5 feet, making it a manageable choice.

Step two: Gather your supplies

Before you begin planting, you will want to make sure you have the following items:

  • Container: Your container should be a minimum of 16” in diameter for one tomato plant. With tomatoes, bigger is always better when it comes to containers. Today I’m using a plastic pot, but you can use almost any container as long as it has a hole in the bottom for drainage. You can also use an EarthBox, which has a sub-irrigated watering system that can increase time between watering.
  • Potting soil: We recommend using a lightweight potting soil, such as Pro Mix Organic Vegetable and Herb, for container-grown tomatoes. For one tomato plant in a 16” pot, you will need two 16 qt. bags of potting mix.
  • Small square of landscape fabric: Place this over the drainage hole in the bottom of the pot to prevent soil from escaping and keep your patio clean. This will also prevent critters from coming into the pot.
  • Tomato cage or other support structure: To keep your tomato contained within the pot, we recommend using a tomato cage or a plant stake to support the vine.
  • Fertilizer: I like to use an organic fertilizer, such as Espoma Tomato Tone, for my edible gardens. You can also use an inorganic, slow release granular, such as our Merrifield Flowering Plant Food or Osmocote.
  • Granular lime: I like to mix lime in with my tomatoes to prevent disease and boost growth.
  • Squirrel repellent: I have lots of squirrels in my yard so I use a squirrel repellant to discourage them from tampering with my tomato plant. I like the I Must Garden brand as it’s organic.
  • River jack stones or seminole chips: You’ll use these to cover the top of the container surface. This will protect your plants from squirrels and preventing dirt from washing out of the top of the pot.
  • Hand shovel
  • Gardening gloves
  • Watering wand and hose

Step three: Plant

Since your container can be heavy once its filled with the soil, we recommend setting the container in place before you plant your tomatoes.

  1. Place your piece of landscape fabric over the drainage hole in the bottom of the pot.
  2. Fill your container 2/3 of the way with potting soil.
  3. Add your fertilizer and lime to the potting soil and mix with your hand shovel. Be sure to follow the instructions on the label to determine the appropriate amount of fertilizer and lime to mix in.
  4. Add your tomato plant. Break up the roots and remove the bottom set of leaves before placing your plant in the pot. You can cover your tomato with soil all the way up to the second set of leaves.
  5. Top off the container with soil, but keep it an inch from the top of the container to keep it from spilling over the sides as you water.
  6. Place your tomato cage in the pot. You will want to do this right after planting to prevent the cage from damaging the root system of the tomato.
  7. Cover the surface of the soil with a half-of-an-inch of small river jacks or seminole chips.
  8. As an extra layer of protection, spray your tomato with squirrel repellent.

Step four: Water and nourish

Once your container is set, water it thoroughly. Run the water over your container, letting it drain out of the bottom. Tomato plants need to be watered frequently to maintain consistent moisture in the soil. The soil should not be allowed to dry out. During hot weather, you will likely need to water your tomato plant daily.

For the best tomatoes, we recommend feeding your plant every 2-4 weeks with fish emulsion.

Your plant will be ready to harvest later this summer, and will continue to produce fruit through the end of the season.