Tag Archive for: family

Seed Starting Seedings indoors in witner

Winter Family Activity: Growing Seeds

Starting seeds indoors is a wonderful way to teach your children about gardening while also providing them with a fun diversion from the cold winter weather. This simple activity can be completed with just a few supplies, and will give children a project that will last for several days or even weeks as they watch their plants sprout.

Seed Starting Supplies and Tools

Seed Starting Supplies

  • Trays with holes for drainage
  • Plastic lid for trays, or plastic wrap
  • Popsicle sticks for labeling seed trays
  • Spray bottle
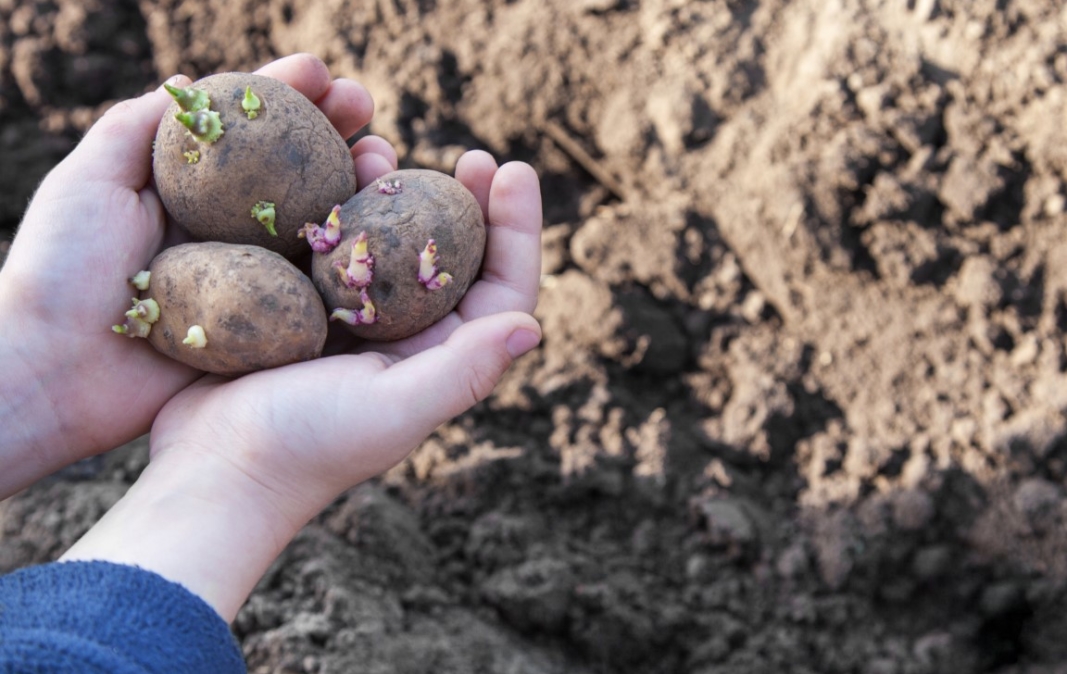
  • Seed packets (for growing seeds with children, we recommend sunflowers, zinnias, beans, cucumbers or squash)
  • Seed starting media (we recommend Espoma Organic Seed Starter for an children’s activity)

Step 1: Select Your Seeds

Some seeds are more suited to growing with children than others. You can select just about any vegetable or flower that you want for this project, but sunflowers, zinnias, beans, cucumbers, and watermelon are a few favorites that are easy to grow. If you are planning to plant these seeds outdoors after they sprout, check the last frost date for your region and plant your seeds so that they are ready to plant outdoors at the right time.
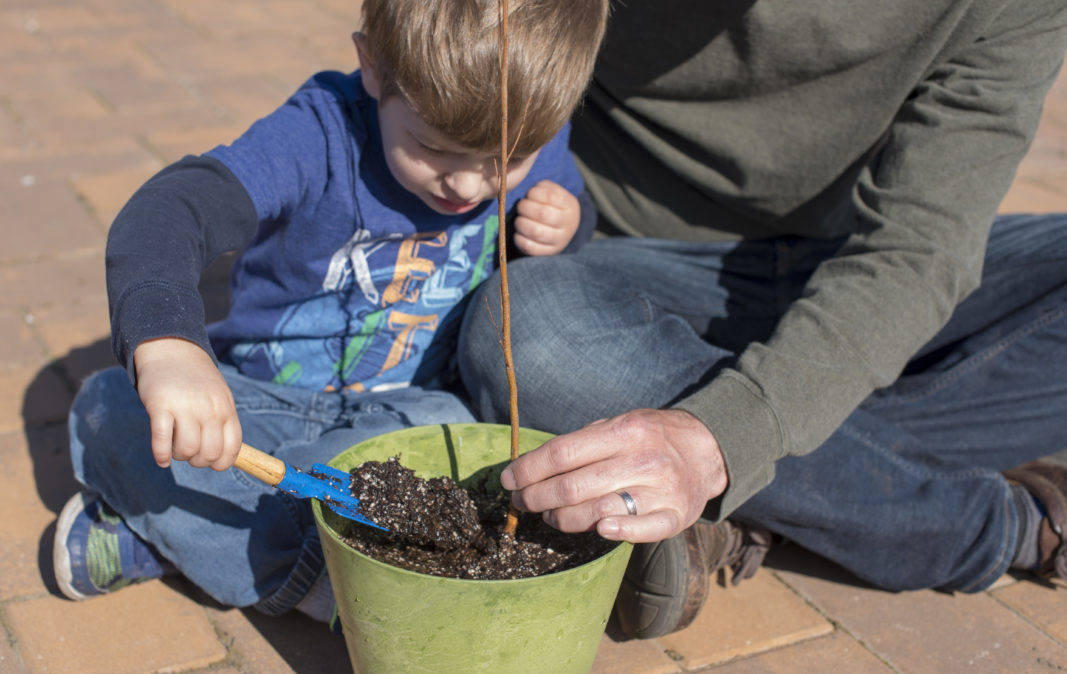
Seed starting mix

Step 2: Sow

Place your seed starting medium in a bucket and add water to moisten it until the soil has a crumbly texture. Fill your seed trays with soil, pressing down on the soil gently to eliminate air gaps. Insert your finger into the soil at a depth of two to three times the thickness of the seed in a few places in each seed tray cell to make holes. Place a seed in each hole. Once you place all of your seeds, cover them with seed starting media, then mist with water. As soon as you finish one type of seed, label the tray with the plant name and date using your popsicle sticks.

Seed Tray with Dome

Step 3: Light

Cover your tray with the plastic wrap or the tray lid and set it under the light source or in an east or south facing window. For best growth, your seedlings will need at least 12 hours of light per day.

Step 4: Water

If you are using a grow light, place it a few inches above the seeds and raise it as they mature. Check your seed trays for moisture daily and keep the soil evenly moist using your spray bottle.

Step 5: Observe

Watch how your seeds grow by checking them every day and taking a photo or drawing a picture of what your seeds look like.

ISTOCK seed potatoes

How to Start a Vegetable Garden with Your Family

With spring officially here, now is a great time to start a cool season vegetable garden with herbs, potatoes, onions and leafy greens. This is a great activity to bring the whole family outdoors for weeks on end, as you plant your seeds, watch them grow, and finally harvest mature veggies later this season. There are many plants that can be harvested quickly to enjoy the rewards of your work while you are waiting on your slower growing vegetables to mature, and all you need to get started is a small area with plenty of sunlight, seeds and a few supplies.

Virginia may still have some nights with frost, so at this point you will want to choose frost hardy plants that can tolerate the cool nights of spring. Greens, root vegetables and a variety of herbs are good picks. 

Cool season herb seeds, parsley, fennel and dill

Supplies

  • Shovel, hoe or small trowel
  • Organic compost, such as Bumper Crop (2 cu. ft. bag covers 25-50 sq. ft.)
  • Organic fertilizer, such as Plant-tone or Garden-tone (3.5 lbs. per 50 sq. ft.)
  • Cool season seeds
    • Herbs: Cilantro, dill, fennel and parsley
    • Leafy Greens: Cabbage, kale, loose-leaf lettuces and spinach are a few good picks. Loose-leaf lettuce will harvest quickly so are great picks for planting with your kids.
    • Root vegetables: Garlic, potatoes and onions

Prepare Your Garden Bed

Regardless of the crops you will be planting, you can set your plants up for success by preparing the soil in advance. To give your veggies a boost, turn up the soil in the area you will be planting with a hoe, shovel or trowel. Next, spread your organic compost over the area in a 1/2 inch to 1 inch layer and add about 3.5 lbs. of fertilizer per 50 sq. ft. of soil. Mix both into your turned up soil.

How to Start Seeds in the Ground

The plants suggested in this post are all frost hardy, and can handle some of the cool weather we may still experience between now and our final frost date later this season. You can work with other plants, but keep in mind that the average last frost date of our area is still several weeks away. You may need to take steps to keep non-frost hardy plants safe from the cold weather. 

Planting Steps

For more detailed instructions on direct sowing seeds in the ground, you can see our post on starting fall seeds. The method of direct sowing in the spring is the same.

  1. Review each seed packet before planting to make sure that you are planting at the correct depth and spacing. 
  2. Make a groove in the soil to the depth indicated on your seed packet. Sow seeds along the groove spaced according to the directions on your seed packet. 
  3. Cover the seeds gently with soil, and water carefully with a gentle spray of the hose or a watering wand.

When to Harvest

Most cool season vegetables are at their best when temperatures are 55-65 degrees and should be harvested before the arrival of summer heat. When temperatures jump into the 80’s, they may begin to flower. This causes the plant to produce fewer, less flavorful leaves. Gardeners call this ‘bolting’. Some herbs, such as fennel and dill have flavorful seeds and you can allow them to continue growing into the summer to enjoy their flowers and seeds.

Planting Onions, Potatoes and Garlic

Onions, potatoes and garlic are a bit different from our other cool season veggies in that you do not start them from a typical seed. Rather, you actually use part of a seed potato or dried onion or garlic bulb. Avoid using traditional potatoes, onion and garlic purchased from the grocery store as they are treated with sprout inhibitors to prevent them from sprouting on the shelf or in your pantry. 

ISTOCK seed potatoes

Seed Potatoes

  1. Prepare your seed potatoes for planting a couple of days ahead of time by cutting the potatoes into large pieces, each with one or two “eyes” 
  2. Spread them out to dry indoors for a couple of days to prevent rot once they are in the soil. 
  3. Place seed potato cuttings about a foot apart in holes approximately 2-3 inches deep, with the cut side down. Cover with soil.
  4. Water with a gentle spray of the hose or with a watering wand.

Dried Onions

Onions can be planted from seed, but onion sets, which are just dried onions, will mature much faster. 

  1. Plant your onion sets, placing bulbs approximately 6 inches apart and bury them no more than 1 inch deep in the soil. 
  2. Water with a gentle spray of the hose or with a watering wand.

Dried Garlic

Garlic is grown from the individual cloves. Each clove will produce one ‘head’ of garlic.

  1. Separate the head of garlic into individual cloves
  2. Plant each clove approximately 4 – 6 inches apart and bury them no more than 1 inch deep in the soil. 
  3. Water with a gentle spray of the hose or with a watering wand.

When to Harvest Garlic, Onions and Potatoes

Harvest your garlic and onion greens by pulling them out of the ground while they are still young, before they form bulbs. These are delicious in salads or as seasoning in other dishes. If you are growing them for the bulbs, leave them in the ground until summer, when the greens begin to yellow and fade. You should remove any flower buds so the plants will put more of their energy producing a larger bulb.

Harvest potatoes soon after the plants reach the flowering stage. At this time they are still small, thin skinned and called “new potatoes”. For larger, mature potatoes, wait until late summer or fall when the plants yellow and wither to the ground.

Feeding and Watering Your Plants

You can continue to fertilize your growing vegetables with an organic fertilizer throughout the growing season. Use 1/3 of a cup per plant, or 1 1/3 of a cup per 5 ft. row of plantings. 

When watering newly planted seeds, be careful about washing them away. It is best to use a gentle spray from a hose or a watering wand to keep them moist as they begin to sprout and develop roots. Try to check daily and see that the soil is moist and water when it begins to feel dry. After they have grown to be about three inches or more, it’s a good time to spread mulch around the plants. One to two inches of straw will help to prevent weeds, conserve moisture and prevent the soil from eroding or splashing on to your vegetables. Now that your vegetables and herbs are off to a strong start, you can begin to water more deeply and less often. Still, try to check in every 1-2 days to see what is new or may need attention. If you have any questions about caring for your vegetable garden, let us know! We are happy to provide tips and advice.

Planting Seedlings for Arbor Day

Update to our seedling giveaway event:

Thank you for your participation in our 2018 Arbor Day seedling giveaway! The response was overwhelmingly enthusiastic. We encourage you to send us photos of your planting projects at photos@mgcmail.com!

As a garden center, Arbor Day is one of our favorite holidays. Each year we celebrate by encouraging our friends, family and customers to cultivate and care for our environment by planting trees in their gardens.

This year, we are excited to take this celebration a step further by actually giving away native white dogwood seedlings for families to plant! Take on a planting project with your children, your family, or your friends this year to celebrate the environment and add a beautiful new plant to your home and garden. As the white dogwood seedlings grow, they will improve the air quality of our region, create habitats for local wildlife, and serve as a food source for birds, pollinators and other animals.

How to Plant a Seedling

Seedlings can be planted in the ground or in a container. It is best to plant them within 24 hours of bringing it home, but if you cannot do so, keep the roots of your tree moist. Wrap your seedling in plastic and store it in a cool, dark spot between 40 degrees and 60 degrees, then plant your seedling as soon as possible.

Container Planting

Supplies:

  • Container (At least 1 gallon in size and 6-7 inches deep)
  • Water soluble or slow release fertilizer
  • Merrifield Potting Mix

Steps:

  1. Select a container with a drainage hole that is slightly larger than the root system in depth and width (a one-gallon pot that is 6-7 in. deep is generally enough to maintain the growth of the seedling for one year)
  2. Soak your seedling’s roots in a bucket or bowl of water for several hours.
  3. Top soil and garden soil are generally too heavy for seedlings. Use Merrifield Potting Mix to get your seedling off to a strong start.
  4. Place the seedling in the container, and fill with Merrifield Potting Mix to the top of the point where the roots begin.
  5. If your potting mix does not contain a slow release fertilizer, apply a slow release fertilizer at half the concentration recommended for house plants. Re-apply once per month.
  6. Water your container thoroughly. Test the soil for moisture regularly and water as needed when the soil is dry.
  7. You can keep your tree in a one-gallon container in a spot with full sun to part shade for approximately one year before transferring it to the ground.

Planting in the ground

Supplies:

  • Shovel
  • Bucket or bowl
  • Mulch
  • Garden hose
  • Watering Wand
  • Merrifield Planting Mix

Steps:

  1. Select a location for your tree. Ideally, it should be sheltered from weather, wildlife and lawn mowers for the first few years, then transplanted to another location. If you will be planting it in the spot you intend to be its permanent location, place a fence around the tree to protect it from lawn mowers and foraging wildlife.
  2. Soak your seedling’s roots in a bucket or bowl of water for several hours.
  3. Dig a hole as deep as the depth of the roots for your seedling, allowing plenty of room around it for the roots to grow and spread out.
  4. Place your seedling in the hole, making sure that the top of the roots is at the level of the soil line.
  5. Mix your existing soil with Merrifield Planting Mix or other soil conditioner and use this mixture to backfill the hole.
  6. Apply a water-soluble fertilizer at half the concentration recommended for house plants once per month.
  7. Water thoroughly and deeply with your watering wand, saturating the root zone. Water deeply whenever the soil is dry to encourage deep roots.
  8. After planting, mulch 2-3 inches deep around the seedling to retain soil temperature and moisture. Leave unmulched soil around the trunk.

Celebrating Arbor Day

Looking to celebrate Arbor Day with a planting project, but prefer to plant a tree larger than a seedling?

Visit our post on trees and shrubs that grow well in our region.